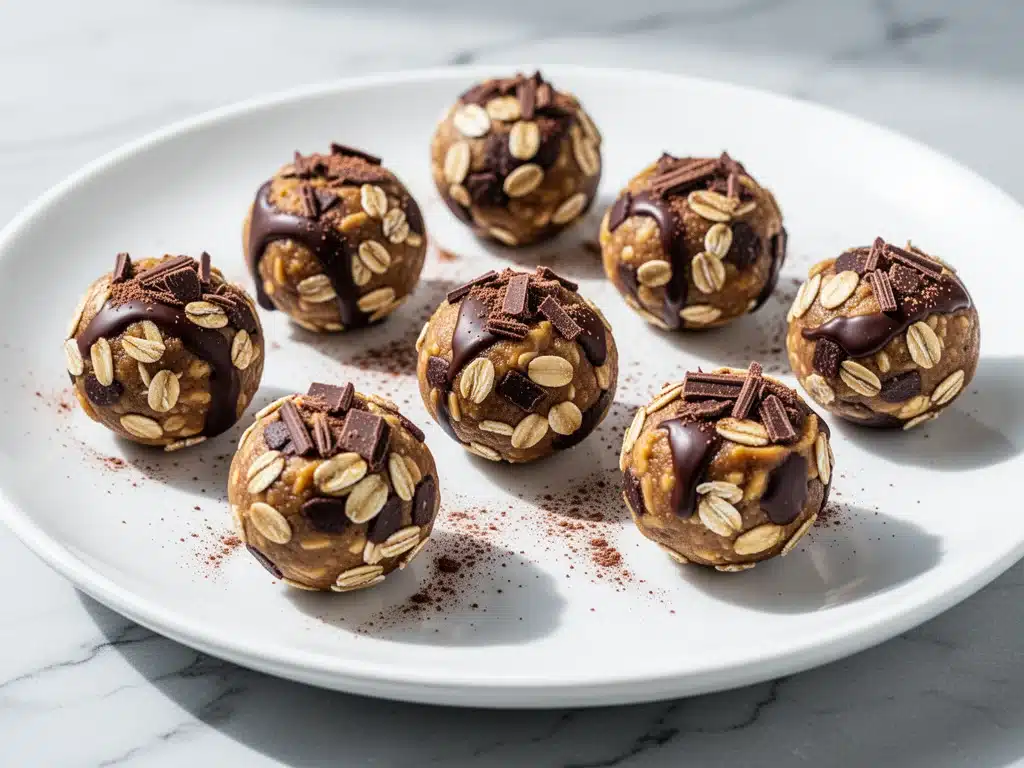
Let me tell you about the week I almost broke my diet. It was a Tuesday, I was running on three hours of sleep, and I was standing in the checkout line at the grocery store. In my basket, I had a bag of those pre-packaged protein balls. You know the ones—the ones that cost $6.99 for six little balls, feel like they’re made mostly of cardboard and marketing, and taste like sweetened sawdust. I stared at the price tag, then at my empty fridge at home, and I made a decision. I was done being ripped off.
I went home and raided my pantry. I had oats, peanut butter, honey, and a bag of chocolate chips. I threw them together in a bowl, rolled them into little spheres, and tossed them in the freezer. Twenty minutes later, I took one out. It was cold, chewy, and tasted exactly like a Reese’s Cup had a baby with a granola bar. Better, actually. Because I knew exactly what was in it.
That was the moment I discovered that no-bake peanut butter chocolate energy bites aren’t just a snack. They’re a lifesaver. Since that day, I’ve made this recipe probably fifty times. I’ve made them for my kids’ after-school snacks, I’ve made them for my office desk drawer, and I’ve made them when I’m too tired to cook dinner but still want something that doesn’t taste like processed garbage. These bites are sticky, sweet, salty, and incredibly satisfying. And the best part? They take about ten minutes of active time. No baking, no oven, no mess. Just pure, unadulterated snacking joy.
Why You’ll Love This Recipe (It’s Not Just About the Taste)
I know what you’re thinking. “Another energy bite recipe? How is this different?” Here’s the thing: most of those recipes you find online are either too dry, too sweet, or fall apart in your hands. I’ve tweaked this version until it’s perfect. It’s the gold standard for quick snacks. Here’s why these no-bake peanut butter chocolate energy bites have earned a permanent spot in my kitchen:
- Zero Baking Required — Seriously. If you can stir ingredients in a bowl and roll them into balls, you can make these. I’ve made them at 11 PM while waiting for my husband to come home from work. No oven heat, no waiting for preheating, no cleaning a baking sheet.
- Ready in 20 Minutes — The actual mixing and rolling takes maybe 10 minutes. The rest is just chilling time in the fridge. You can have a batch ready before your morning coffee brews.
- Pantry Staples Only — You likely have every single ingredient right now. Oats, peanut butter, honey, chocolate chips. That’s it. No weird superfoods you have to order online. No expensive almond flour. Just good, honest food.
- Perfectly Balanced — This isn’t just sugar. The oats provide fiber, the peanut butter gives you protein and healthy fats, and the honey offers natural sweetness. It’s a snack that actually keeps you full. I had a batch of these last week, and I didn’t feel the urge to raid the vending machine at 3 PM.
- Kid-Approved (Even the Picky Ones) — My son used to hate “healthy snacks.” He’d push the apple slices away and demand crackers. But these? He thinks they’re cookies. He doesn’t know they’re packed with oats and protein. That’s a win in my book.
- Meal Prep Champion — I make a double batch every Sunday. They keep in the fridge for two weeks or in the freezer for three months. They are the ultimate “grab-and-go” solution for busy mornings or unexpected hunger pangs.
These bites have replaced my afternoon candy bar habit, saved me money, and honestly, they just taste better than anything I’ve bought at a store. They’re chewy, rich, and deeply satisfying.
Ingredients You’ll Need for the Best Energy Bites
This recipe is famous for its simplicity, but the quality of your ingredients matters more here than in most baked goods. Since there’s no masking flavor from spices or complex sauces, you taste exactly what you put in. Here’s what you need to make these no-bake peanut butter chocolate energy bites shine.
The Base
Old-Fashioned Rolled Oats (2 cups / 160g) — Do not use instant oats or steel-cut oats. Instant oats are too fine and will make the bites mushy. Steel-cut are too hard and won’t soften in the fridge. You need the chewy texture of old-fashioned rolled oats. I prefer the organic kind, but any brand works. If you need gluten-free, just make sure your oats are certified gluten-free.
Crunchy Peanut Butter (1 cup / 250g) — This is non-negotiable for me. Smooth peanut butter makes the mixture too soft and the bites won’t hold their shape well. Crunchy adds texture and prevents them from being too dense. Use natural peanut butter if you want, but make sure it’s well-stirred and not too oily. If your natural PB is runny, you might need a bit more oats. I like Jif or Skippy for consistency, but I also love my local brand’s crunchy stuff.
Honey (½ cup / 120ml) — Honey acts as the binder. It’s sticky and sweet. Maple syrup works too, but it’s thinner, so you’ll need to chill the mixture longer. Agave nectar is another option, but honey just has that rich flavor that pairs perfectly with peanut butter. Use raw honey if you can—it’s less processed and tastes fresher.
The Flavor Boosters
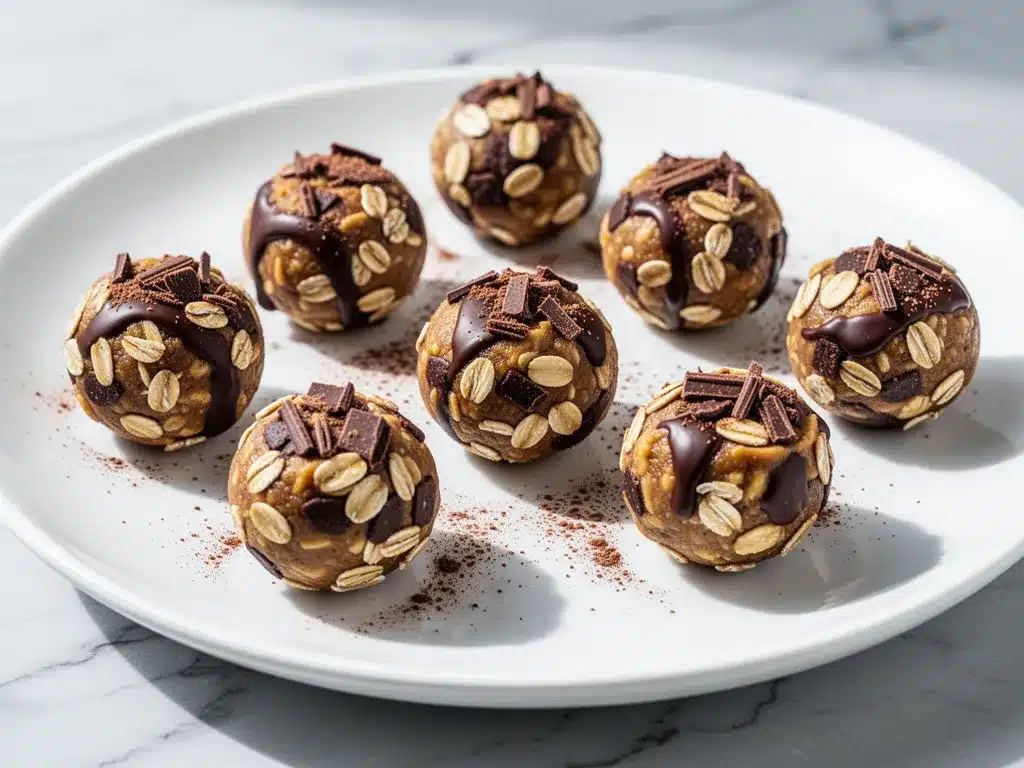
Vanilla Extract (1 teaspoon) — This is the secret ingredient that makes them taste like dessert. Don’t skip it. It rounds out the peanut butter flavor and adds a subtle warmth. Use pure vanilla extract, not imitation. I keep a bottle of McCormick on my shelf, but any good brand works.
Salt (½ teaspoon) — Even though these are sweet, salt is crucial. It enhances the peanut butter flavor and balances the sweetness. If you use salted peanut butter, reduce this to a quarter teaspoon. I always use fine sea salt.
Chocolate Chips (½ cup / 85g) — Semi-sweet chocolate chips are my go-to. They’re not too sweet and they melt slightly when you bite into them, creating little pockets of chocolate. Milk chocolate chips work if you prefer sweeter bites. Dark chocolate chips are great if you want less sugar. I sometimes mix semi-sweet and white chocolate chips for variety.
Optional Add-Ins
Mini Chocolate Chips — I often swap regular chips for mini chips because they distribute more evenly throughout the bite. You don’t get that weird chunk of chocolate in one bite and none in the next.
Chopped Peanuts — If you’re a peanut butter lover, add a quarter cup of chopped roasted peanuts. It doubles down on the flavor and adds extra crunch.
Flaxseed or Chia Seeds — I like to stir in two tablespoons of ground flaxseed. It adds omega-3s and a slight nuttiness without changing the taste. It’s an easy way to boost the nutrition.
Ingredient Tips & Substitutions
Butter Alternative: If you’re dairy-free, use sunflower seed butter or almond butter instead of peanut butter. The texture will be slightly different—almond butter is softer—so you may need to add an extra quarter cup of oats. Sunflower seed butter works surprisingly well and has a milder flavor.
Sticky Situation: If your mixture is too dry and won’t stick together, add another tablespoon of honey or a splash of water. If it’s too wet and sticky to roll, add more oats, one tablespoon at a time. The ideal consistency is like a thick dough that holds its shape when squeezed.
Equipment Needed
You don’t need anything fancy for this. Here’s what I actually use in my kitchen:
Large Mixing Bowl — I use a 4-quart stainless steel bowl. It’s big enough to mix everything without making a mess. A glass bowl works too, just make sure it’s sturdy.
Spatula — A silicone spatula is best for mixing. It scrapes the sides of the bowl so you get all the peanut butter and oats incorporated. I have a few from OXO, and they’re worth the money.
Measuring Cups and Spoons — Standard stuff. I use metal measuring cups for dry ingredients and plastic or metal spoons for wet. Accuracy matters here because the ratio of oats to wet ingredients affects the texture.
Baking Sheet or Tray — You’ll need a flat surface to chill the bites. I line a baking sheet with parchment paper. This prevents sticking and makes cleanup a breeze. You can also use a plate, but a sheet holds more bites.
Refrigerator or Freezer — Obviously, you need cold storage. The freezer is faster (20 minutes), but the fridge is better if you’re planning to eat them over a few days. Both work fine.
Optional: Cookie Scoop — If you want uniform bites, a small cookie scoop (about 1 tablespoon) is great. It saves time and makes them look professional. But my hands work fine too—I just eyeball it.
How to Make It: Step-by-Step
Alright, let’s make these no-bake peanut butter chocolate energy bites! It’s incredibly simple, but there are a few tricks to get the texture just right. I’m walking you through exactly how I do it.
Step 1: Mix the Wet Ingredients (2 minutes)
In your large mixing bowl, combine the crunchy peanut butter and honey. If your peanut butter is very cold and stiff, microwave it for 15-20 seconds to soften it. This makes mixing much easier. Stir them together until they are smooth and well combined. Add the vanilla extract and salt. Mix again until everything is uniform. The mixture should look glossy and sticky.
Step 2: Add the Dry Ingredients (1 minute)
Pour in the rolled oats and stir them into the peanut butter mixture. At this point, it will look dry and shaggy. Don’t worry. Keep stirring. The oats will absorb the moisture from the peanut butter and honey. Mix until there are no dry patches of oats left. It should look like a thick, sticky dough.
Step 3: Fold in the Chocolate Chips (1 minute)
Stir in the chocolate chips. If you’re using chopped peanuts or flaxseed, add them now. Mix gently but thoroughly to distribute them evenly. You want every bite to have a little bit of chocolate.
Step 4: Chill the Mixture (15-20 minutes)
This is the most important step. Cover the bowl with plastic wrap or a lid and put it in the freezer for 15-20 minutes, or the fridge for 30-45 minutes. Why? Because the mixture is soft and sticky at room temperature. Chilling firms up the peanut butter and oats, making it much easier to roll into balls. If you skip this, you’ll end up with sticky fingers and misshapen blobs. I’ve learned this the hard way.
Step 5: Roll the Bites (10 minutes)
Once the mixture is firm, take it out. Scoop out about a tablespoon of the mixture at a time. Roll it between your palms to form a smooth ball. If the mixture is still too sticky, wet your hands slightly with water. This helps prevent sticking. Place the finished balls on the parchment-lined baking sheet. Try to make them about 1 inch in diameter. You should get about 20-25 bites from this recipe.
Step 6: Final Set (10 minutes)
Put the baking sheet back in the freezer for another 10 minutes to set completely. This ensures the chocolate chips firm up and the bites hold their shape. After 10 minutes, they are ready to eat!
Step 7: Store and Enjoy
Transfer the bites to an airtight container. They are best stored in the refrigerator, but they can also be kept at room temperature for a day or two (though they might get soft in hot weather). Enjoy immediately or save them for later.
Expert Tips & Tricks for Perfect Bites
Here’s everything I’ve learned from making this dozens of times. These tips will save you from my mistakes and ensure your bites are perfect every time.
Don’t Skip the Chill
I cannot stress this enough. If you try to roll the bites immediately after mixing, they will be a sticky mess. The cold is what gives them their chewy, firm texture. If you’re in a rush, the freezer works. If you have time, the fridge is gentler and keeps them from getting too hard.
Use Your Hands Wisely
If the mixture sticks to your hands, wet them with cold water. Just a little bit. This creates a barrier so the mixture doesn’t adhere to your skin. Alternatively, you can lightly grease your hands with a tiny bit of peanut butter or oil, but water is cleaner.
Keep Them Uniform
For even cooking (if you ever decide to bake them, which I don’t recommend) and for presentation, try to make them all the same size. A cookie scoop helps, but if you’re using your hands, just try to eyeball it. Consistency helps them chill evenly.
Customize the Chocolate
Don’t just stick to chocolate chips. Try chopped dark chocolate bars for bigger chunks. Or add dried cranberries or raisins for a fruity twist. I once made a batch with mini M&Ms, and they were a hit at a party. Get creative!
Avoid Over-Mixing
Once you add the oats, mix just until combined. Over-mixing can crush the oats and make the texture too dense. You want distinct oats for that chewy bite.
Storage Hack
If you’re making a big batch, freeze the bites on the baking sheet first, then transfer them to a freezer bag. This prevents them from sticking together in a clump. You can grab them straight from the freezer whenever you need a snack.
Variations & Substitutions
Once you’ve mastered the basic version, here’s how you can mix it up. I’ve tried all of these, and they’re all delicious.
Almond Butter Version
Swap peanut butter for almond butter. The flavor is nuttier and slightly sweeter. Since almond butter is softer, you may need an extra quarter cup of oats. Add a pinch of cinnamon for a nice twist.
Seed Butter Version (Nut-Free)
Use sunflower seed butter or pumpkin seed butter. This is great for schools or workplaces with nut allergies. The flavor is milder, so you might want to add a bit more vanilla or a dash of cinnamon.
Protein Power
Add a scoop of your favorite protein powder. Start with two tablespoons and add more if needed. Protein powder can be drying, so you might need an extra tablespoon of honey or water. This is great for post-workout snacks.
Coconut Love
Add a quarter cup of shredded coconut to the mix. Roll the finished bites in extra coconut for a tropical vibe. It adds a nice chew and aroma.
Peanut Butter Cup Style
Before rolling, place a small piece of peanut butter cup candy in the center of each ball, then roll it up. It’s like a homemade Reese’s Cup. Rich, decadent, and perfect for special occasions.
Dairy-Free Option
Use dairy-free chocolate chips and ensure your peanut butter doesn’t contain any added milk solids. Most standard peanut butter is dairy-free, but always check the label.
Serving & Storage
How to Serve
I usually eat these straight out of the container, but here are other ways I’ve enjoyed them:
- Breakfast on the Go: Grab one or two with your coffee in the morning. They provide enough energy to get you through to lunch.
- Post-Workout Snack: The combination of carbs from oats and protein from peanut butter is ideal for recovery.
- Party Appetizer: Serve them on a platter with a dipping sauce, like melted white chocolate or caramel. They’re a hit at potlucks.
- Lunchbox Addition: My kids love these in their lunchboxes. They don’t melt as easily as chocolate bars, and they’re more satisfying than crackers.
Storage Instructions
Refrigerator: Store in an airtight container for up to two weeks. They will stay fresh and chewy. If your kitchen is very warm, the fridge is better to prevent melting.
Freezer: Store in a freezer-safe bag or container for up to three months. They freeze beautifully. Let them thaw for 5-10 minutes before eating, or eat them frozen for a harder, ice-cream-like texture.
Room Temperature: You can keep them at room temperature for 1-2 days, but they may get soft. In hot weather, refrigeration is recommended.
Reheating
You don’t need to reheat these. They are best eaten cold or at room temperature. If they get too hard from the freezer, just let them sit out for a few minutes.
Nutrition Information
I’m not a nutritionist, but here’s the breakdown if you’re tracking. This is approximate and based on 20 bites.
Per Serving (1 bite):
- Calories: 120
- Protein: 4g
- Carbs: 12g
- Fiber: 1g
- Sugar: 7g
- Fat: 7g
- Saturated Fat: 1.5g
- Cholesterol: 0mg
- Sodium: 40mg
What’s Good:
- Good source of healthy fats from peanut butter
- Provides quick energy from oats and honey
- Vegetarian-friendly
- No artificial preservatives
What to Know:
- Higher in calories due to peanut butter and chocolate
- Contains nuts (peanut butter)
- Can be modified to be gluten-free
My Take:
Look, these are treats. They’re not kale salad. But they’re made with real food, no refined sugar, and they keep you full. When I eat them, I enjoy them without guilt. They’re a much better alternative to a bag of chips or a candy bar. Just keep portion control in mind—two bites are usually enough to satisfy a craving.
Final Thoughts
So that’s my go-to no-bake peanut butter chocolate energy bites! I’ve probably talked your ear off at this point, but when you make a recipe this often, you have a lot to say about it. These bites have saved me from vending machine traps, kept my kids happy, and given me a quick, healthy snack option that actually tastes good.
This recipe has become my answer to “what’s for a snack?” when I’m tired, don’t want to cook, and still want something that feels indulgent but nourishing. My family is happy, and I’m happy because I’m not stressed about finding something quick. Make it yours! Try different chocolate chips, add some seeds, or swap the peanut butter. The best recipes are the ones you adapt to your tastes.
If you make these, drop a comment and let me know what you think! I love hearing how recipes turn out in your kitchen. And if something doesn’t work, tell me that too—I’m here to help troubleshoot. Happy snacking!
Frequently Asked Questions
Can I use smooth peanut butter instead of crunchy?
You can, but the texture will be softer. Crunchy peanut butter provides structure and chew, which helps the bites hold their shape. If you use smooth, you may need to add an extra quarter cup of oats to dry it out enough to roll. I recommend crunchy for the best texture.
Why are my energy bites too sticky?
This usually means there’s too much wet ingredient (honey or peanut butter) relative to the oats. Add more oats, one tablespoon at a time, until the mixture is firm enough to roll. Also, make sure you chilled the mixture adequately before rolling. Warm mixtures are always stickier.
Can I freeze these energy bites?
Yes! They freeze beautifully. Place them in a single layer on a baking sheet and freeze for an hour, then transfer to a freezer bag. They will last up to three months in the freezer. Thaw them in the fridge or eat them frozen for a firm, icy texture.
Are these gluten-free?
Yes, as long as you use certified gluten-free oats. Regular oats are often cross-contaminated with wheat during processing. If you have celiac disease or gluten sensitivity, make sure your oats are labeled gluten-free. The rest of the ingredients are naturally gluten-free.
Can I substitute honey with something else?
Maple syrup or agave nectar work as substitutes. Keep in mind that they are thinner than honey, so you may need to add a bit more oats to compensate for the extra liquid. Maple syrup will also impart a distinct flavor, which some people love.
How do I keep them from sticking to my hands?
Wet your hands with cold water before rolling. The water creates a barrier that prevents the sticky mixture from adhering to your skin. You can also lightly grease your hands with a tiny bit of oil or peanut butter, but water is usually sufficient.
Can I make these ahead for a party?
Absolutely. Make them a day or two before the event and store them in the refrigerator. They actually taste better after chilling for a while as the flavors meld together. Just take them out of the fridge 15 minutes before serving so they aren’t too hard.
Pin This Recipe!
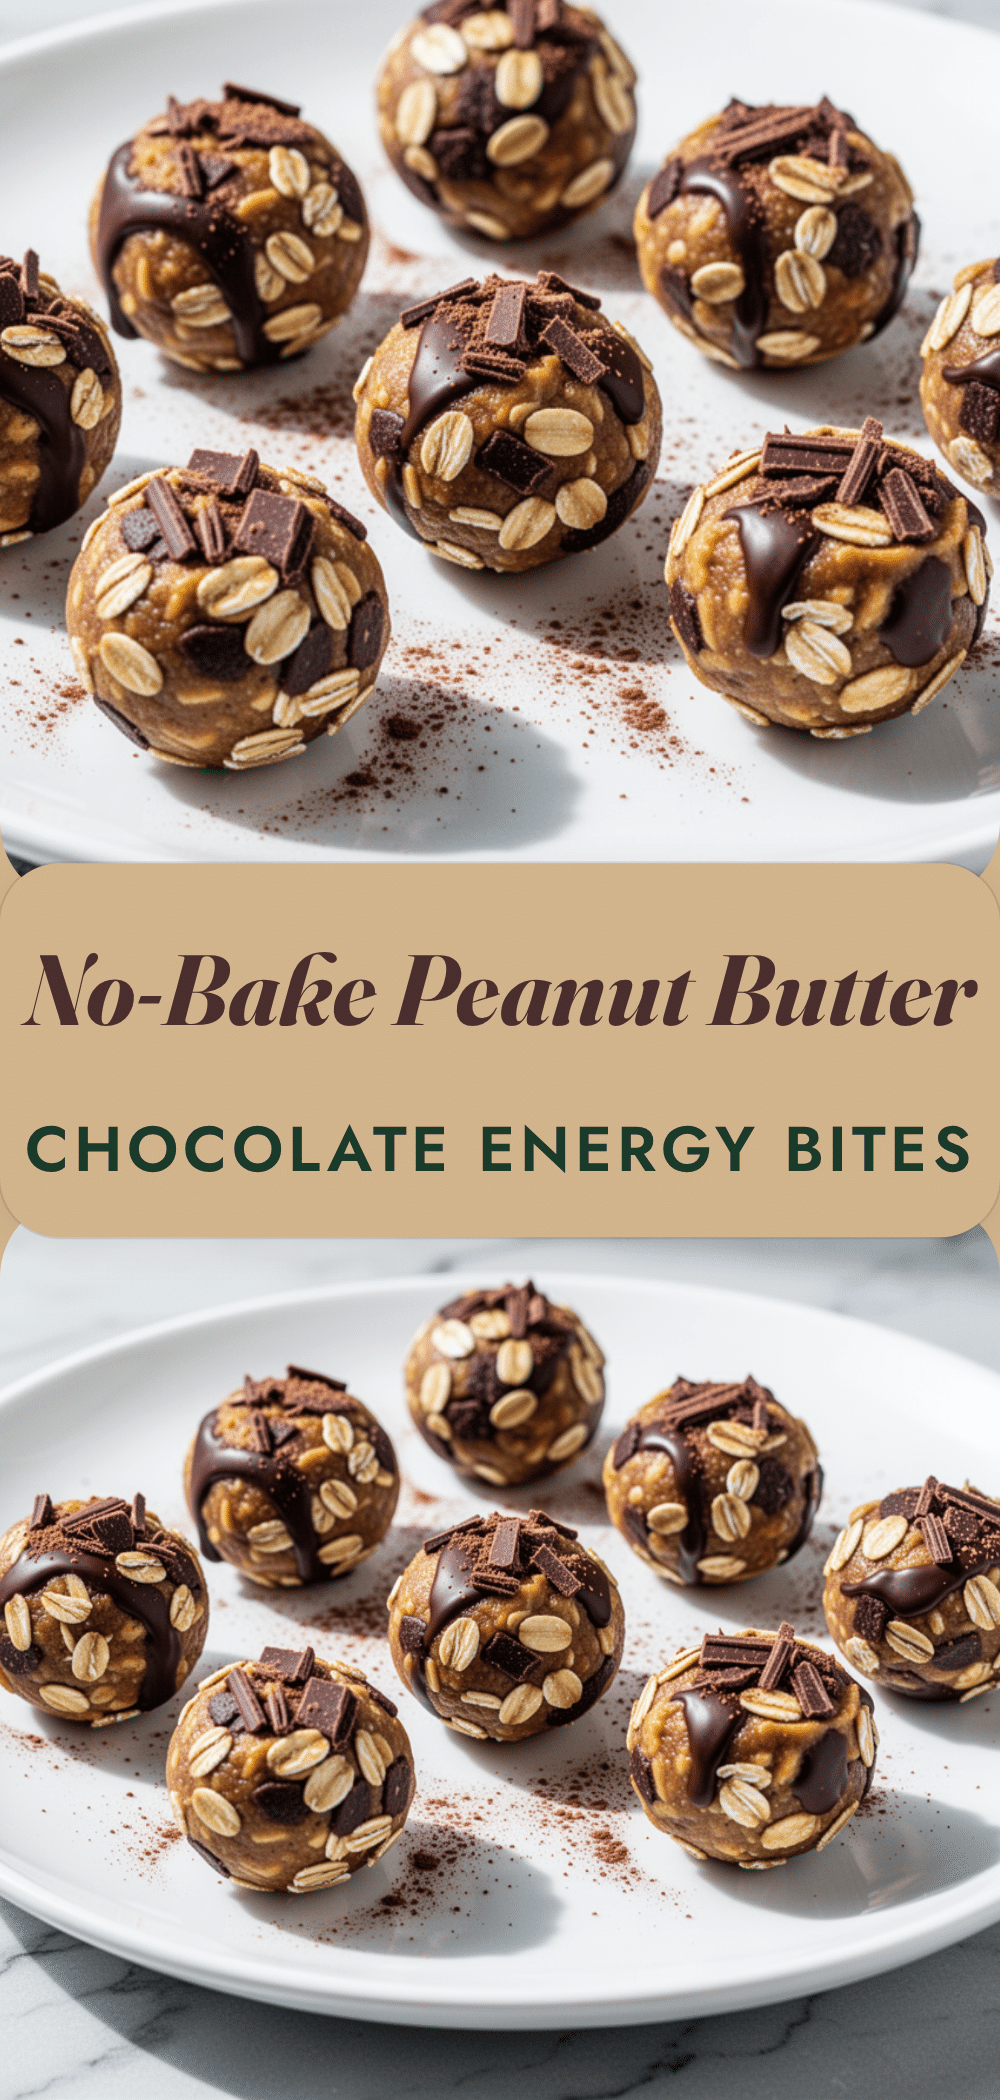
No-Bake Peanut Butter Chocolate Energy Bites
- Total Time: 20 minutes
- Yield: 20-25 servings 1x
Description
These no-bake peanut butter chocolate energy bites are a quick, healthy, and satisfying snack made with pantry staples. They are chewy, sweet, and salty, requiring no baking and just 10 minutes of active prep time.
Ingredients
- 2 cups old-fashioned rolled oats
- 1 cup crunchy peanut butter
- 1/2 cup honey
- 1 teaspoon vanilla extract
- 1/2 teaspoon salt
- 1/2 cup semi-sweet chocolate chips
Instructions
- In a large mixing bowl, combine the crunchy peanut butter and honey. If the peanut butter is stiff, microwave it for 15-20 seconds to soften. Stir until smooth.
- Add the vanilla extract and salt to the peanut butter mixture and mix until uniform.
- Pour in the rolled oats and stir until fully incorporated and the mixture resembles a thick, sticky dough with no dry patches.
- Fold in the chocolate chips (and any optional add-ins like chopped peanuts or flaxseed) until evenly distributed.
- Cover the bowl and chill the mixture in the freezer for 15-20 minutes or in the refrigerator for 30-45 minutes to firm up.
- Scoop out about a tablespoon of the mixture at a time and roll between your palms to form 1-inch balls. If the mixture is sticky, wet your hands slightly with water.
- Place the rolled bites on a parchment-lined baking sheet.
- Return the baking sheet to the freezer for 10 minutes to set completely before serving or storing.
Notes
Use old-fashioned rolled oats, not instant or steel-cut. Crunchy peanut butter is recommended for texture. If the mixture is too dry, add more honey; if too wet, add more oats. Wet hands with water if the mixture sticks while rolling. Store in an airtight container in the fridge for up to two weeks or in the freezer for up to three months.
- Prep Time: 10 minutes
- Cook Time: 0 minutes
- Category: Snack
- Cuisine: American
Nutrition
- Serving Size: 1 bite
- Calories: 120
- Sugar: 7
- Sodium: 40
- Fat: 7
- Saturated Fat: 1.5
- Carbohydrates: 12
- Fiber: 1
- Protein: 4
Keywords: no-bake, energy bites, peanut butter, chocolate, healthy snack, gluten-free option, meal prep, quick snack


