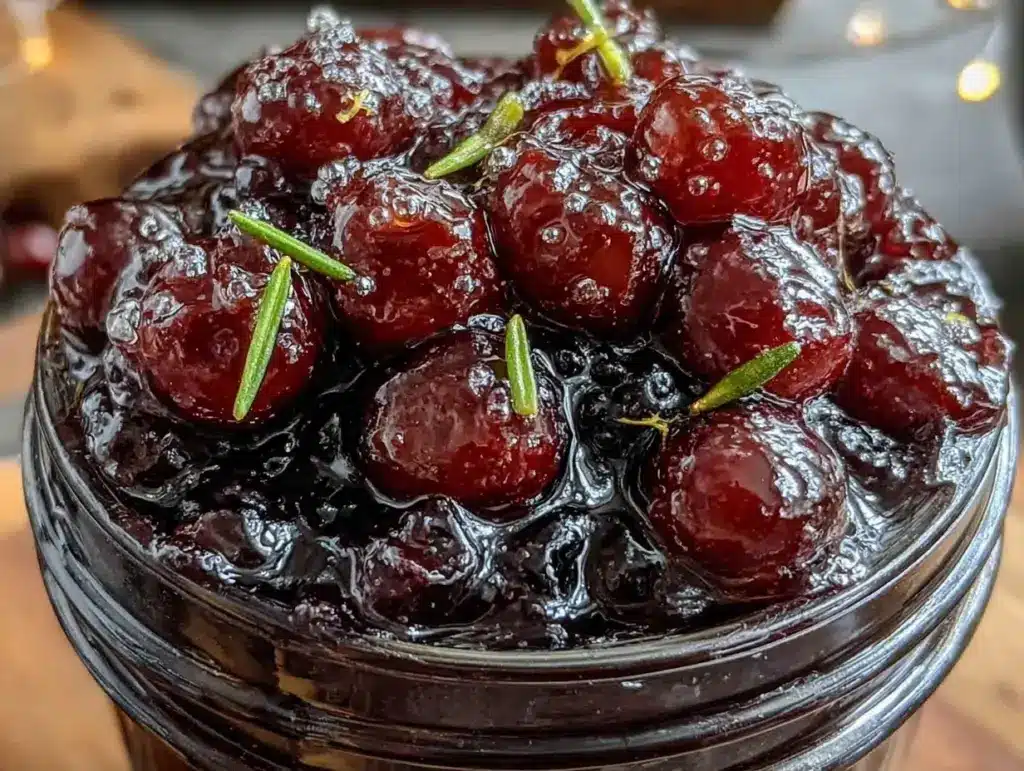
It was mid-December, three years ago, and I had just watched my husband cough himself to sleep for the fourth night in a row. The house smelled like eucalyptus candles and despair. We had tried the over-the-counter syrups, the lozenges that tasted like chalk, and the chicken soup that felt more like punishment than care. I was staring into the dark, wondering if I was doing enough to keep us healthy, when I remembered my aunt’s kitchen during the blizzards of the nineties. She never sent us to the doctor unless we were burning up. Instead, she had a jar of dark, thick syrup on the counter that smelled like spices and old-world wisdom.
I ran to the store, bought dried elderberries, fresh ginger, and raw honey, and threw this together in a pot on the stove. It wasn’t just medicine; it was comfort. The first spoonful was tart, spicy, and deeply soothing. It coated my throat in a way that felt like a hug. That night, I slept through the night for the first time in weeks. Since then, this Immune-Boosting Elderberry Syrup with Ginger and Honey has been a non-negotiable part of my fall and winter routine. It’s not just a remedy; it’s my secret weapon for staying vibrant when the rest of the world is slowing down.
There’s something magical about simmering these ingredients. The kitchen fills with a warm, spicy scent that makes even the coldest, grayest day feel manageable. I’ve made this batch after batch, tweaking the ginger amount until it hit the perfect balance of heat and sweetness. This isn’t a complicated project. It’s simple, natural, and incredibly effective. I’ve been making this elderberry syrup recipe weekly for months, and it’s become my favorite way to care for my family without relying on synthetic supplements. If you’re looking for a natural way to support your immune system, you need to try this.
Why You’ll Love This Elderberry Syrup
Let’s be real. Most home remedies taste like dirt or medicine. This one doesn’t. Here’s why this Immune-Boosting Elderberry Syrup with Ginger and Honey has earned a permanent spot on my counter:
- It Actually Tastes Good — I know, I know. “Natural” usually means “bitter.” But the raw honey balances the tartness of the elderberries, and the ginger adds a zesty kick that wakes up your palate. My kids ask for it on cold mornings. They think it’s a fancy tea syrup.
- Lightning Fast Prep — You don’t need a degree in herbalism. The active cooking time is about 20 minutes. The rest is just simmering and cooling. I make this on Sunday while listening to podcasts, and I have enough for the whole month by Tuesday.
- Pantry Staples (Mostly) — You probably already have the honey and ginger. Elderberries are the only special buy, and they’re cheap. I buy mine in bulk online, but you can find them at most health food stores. It’s far cheaper than buying bottles of immune gummies at the pharmacy.
- Anti-Inflammatory Powerhouse — Elderberries are packed with antioxidants and vitamins C and A. Combined with ginger’s anti-inflammatory properties, this syrup helps reduce swelling and fight off viruses before they take hold. It’s like wearing a nutritional armor.
- So Versatile — You can take it straight by the spoonful, mix it into warm water with lemon, drizzle it over yogurt, or even add it to my creamy roasted butternut squash soup for a spicy-sweet twist. It’s not just for sick days.
- No Preservatives — When you make this at home, you know exactly what’s in it. No high-fructose corn syrup, no artificial dyes, no weird chemicals. Just fruit, spice, and honey.
This is my go-to when I feel that tickle in the back of my throat or when the weather turns nasty. It’s cozy, it’s effective, and it makes me feel like I’m taking control of my health in the most delicious way possible.
Key Ingredients for Your Immune Syrup
The beauty of this Immune-Boosting Elderberry Syrup with Ginger and Honey is its simplicity. You don’t need fancy equipment or obscure ingredients. Here is exactly what you need, and why each piece matters.
Dried Elderberries
(1 cup / 115g) — These are the star of the show. Do not use fresh elderberries; they contain cyanogenic glycosides which are toxic unless cooked thoroughly. Dried elderberries are safe and concentrated. I prefer organic, unsulfured berries. Look for plump, dark purple ones. If they look shriveled or dusty, skip them. These provide the deep color and the antiviral punch.
Raw Honey
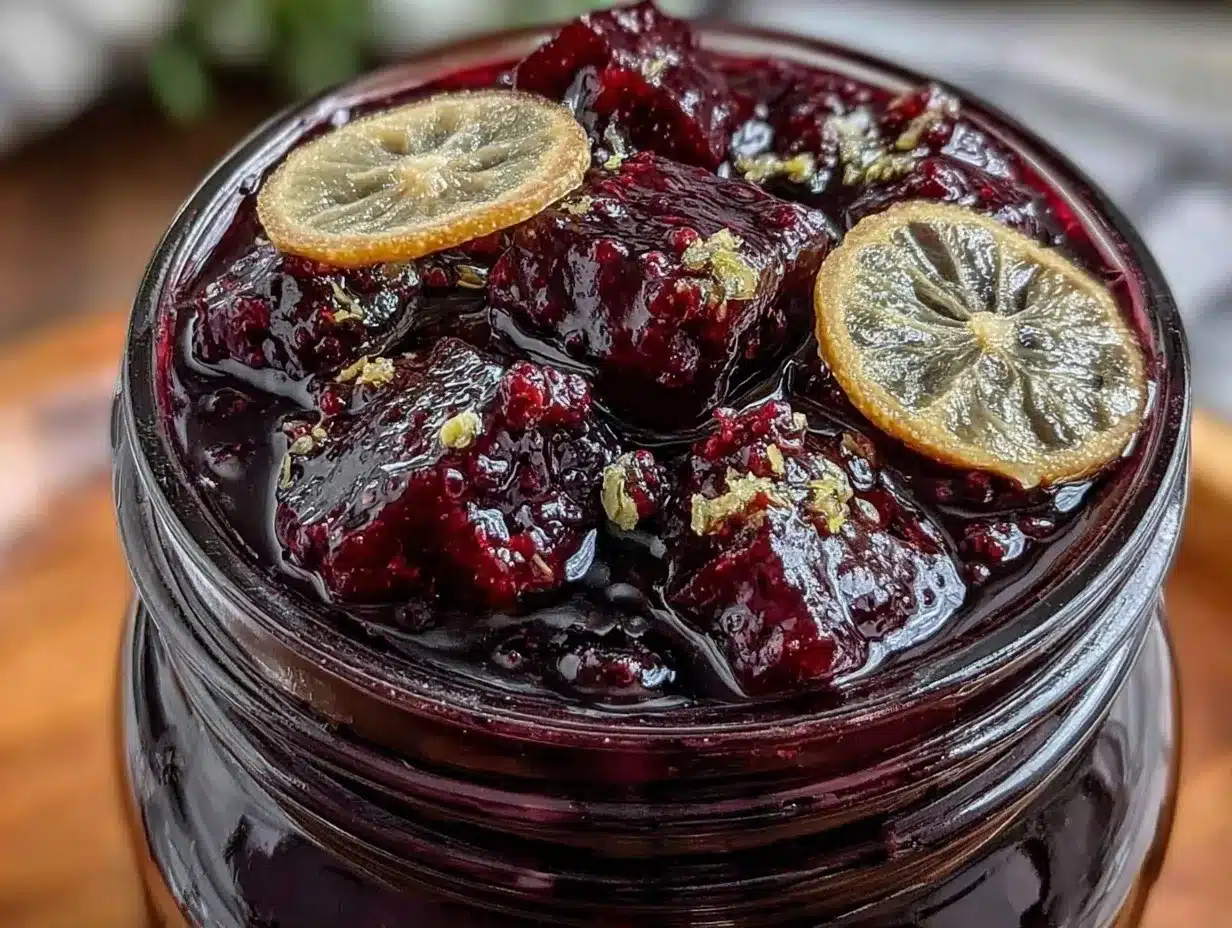
(1 cup / 340g) — Honey is more than just a sweetener. It has natural antimicrobial and wound-healing properties. Use a high-quality, raw honey like Manuka or a local wildflower honey. The flavor matters here. If you use generic supermarket honey, your syrup will taste flat. I love the floral notes of orange blossom honey in this recipe, but clover works too. Important: Do not boil the honey. Add it after the mixture has cooled slightly, or you’ll destroy its beneficial enzymes.
Fresh Ginger Root
(1 large knob, approx. 3 inches / 50g) — Fresh ginger is non-negotiable. Powdered ginger lacks the sharp, spicy kick that makes this syrup so soothing for sore throats. Look for firm, smooth ginger roots. If yours is wrinkled or dry, it’s past its prime. Peel it roughly; you don’t need to be perfectionist here. The ginger adds warmth and helps with nausea, which is a nice bonus if you’re feeling under the weather.
Water
(2 cups / 475ml) — Just good old-fashioned tap water or filtered water. No need for spring water, but if your tap tastes like chlorine, filter it. The water extracts the nutrients from the berries and ginger to create the liquid base.
Cinnamon Stick
(1 whole stick / 3 inches) — This adds a subtle warmth and complexity. It bridges the gap between the tart berries and the spicy ginger. I like to use Ceylon cinnamon if I can find it, as it’s milder and sweeter than Cassia, but any stick will do. It’s an aromatic that makes the house smell incredible while simmering.
Whole Black Peppercorns
(1/2 teaspoon / 1g) — This is my secret weapon. A few peppercorns add a tiny bit of heat that enhances the ginger and helps the body absorb the nutrients. It’s subtle, but it makes a difference. Don’t skip it; it rounds out the flavor profile.
Tools Needed
You don’t need a fancy kitchen to make this. Here’s what I use, and what you can swap if you don’t have it:
- Medium Saucepan — I use a 3-quart stainless steel pot. It needs to be big enough to hold the water and berries with room to simmer without boiling over. If you’re making a double batch, use a larger pot.
- Fine-Mesh Strainer — This is crucial. You want a smooth syrup, not a chunky berry juice. A cheesecloth works too, but it’s messy and slow. A fine-mesh strainer is fast and gets most of the pulp out.
- Masher or Fork — You’ll use this to crush the berries after they’ve softened. It releases more flavor and color. A potato masher is perfect, but a fork works in a pinch.
- Glass Jar for Storage — I use a 16-ounce mason jar. Glass is best because honey can sometimes interact with certain metals over long periods, though it’s minor. Just make sure the jar is clean and dry.
How to Make Immune-Boosting Elderberry Syrup
Let’s get into the pot. This process is forgiving, but there are a few steps that matter for the best texture and potency.
Step 1: Simmer the Base (20 minutes)
In your medium saucepan, combine the dried elderberries, water, peeled and roughly chopped ginger, cinnamon stick, and black peppercorns. Turn the heat to high and bring the mixture to a boil. Once it hits a rolling boil, immediately reduce the heat to low. Let it simmer gently for 20 minutes. You’ll see the water turn a deep, rich purple. The ginger will soften, and the kitchen will smell spicy and earthy. If the water level drops too low (less than 1 cup remaining), add a splash more water. Don’t let it boil dry.
Step 2: Mash and Steep (15 minutes)
Turn off the heat. Remove the cinnamon stick. Using your masher or a fork, press down on the elderberries in the pot. You want to crush them as much as possible to release the juice. The skins will break apart, and the color will deepen. Let the mixture sit in the pot, covered, for 15 minutes. This steeping time allows the flavors to meld and the ginger to infuse fully. It’s not just about extracting; it’s about harmony.
Step 3: Strain the Liquid
Place your fine-mesh strainer over a large bowl or measuring cup. Pour the berry mixture into the strainer. Use the back of a spoon to press firmly on the solids. You want to squeeze every drop of purple liquid out of the pulp. Discard the solids (or compost them). You should have about 1 to 1.5 cups of dark, fragrant liquid. If you have extra ginger chunks that didn’t get crushed, pick them out now.
Step 4: Sweeten and Store
Let the liquid cool until it’s warm to the touch, not hot. This is critical. If you add honey to boiling liquid, you kill the beneficial enzymes. Once it’s warm (about 10-15 minutes after straining), stir in the raw honey until it is completely dissolved. The syrup will thicken as it cools. Pour it into your clean glass jar. Seal tightly.
Total time: About 45 minutes from start to finish. Most of that is waiting. The result is a thick, glossy syrup that keeps beautifully in the fridge.
Expert Tips for Perfect Syrup
Here’s everything I learned from making this too many times, so you don’t have to make my mistakes.
Don’t Rush the Simmer
The first time I made this, I tried to rush it. I boiled it for only 5 minutes. The flavor was weak, and the elderberries didn’t release enough nutrients. Elderberries need time to break down. Give them the full 20 minutes. It’s worth the wait. The color will be much darker, and the medicinal properties will be stronger.
Honey Temperature Matters
I’ve lost honey before because I added it too early. Raw honey starts to lose its delicate floral notes and enzymatic benefits above 118°F (48°C). Let the syrup cool for at least 15 minutes after straining. If you’re impatient, stick your finger in the bowl. It should feel warm, not hot. If it burns your finger, it’s too hot for the honey.
Strain Twice for Clarity
If you hate little bits of pulp in your syrup, strain it twice. Pour the first batch of strained liquid back through the strainer into a clean bowl. It takes an extra minute, but the result is a silky-smooth syrup that looks as good as it tastes. This is great if you’re serving it to guests and want it to look elegant.
Common Problems & Solutions
- Syrup is too thin: Simmer it longer after straining before adding honey. Boil the liquid alone for 5-10 minutes to reduce it. It will thicken as it cools.
- Syrup is too thick: Add a teaspoon of warm water or warm tea to loosen it. It should pour like maple syrup.
- Crystallization: If the honey crystallizes in the jar, just place the jar in a bowl of warm water to melt it back down. It’s normal and doesn’t affect quality.
Recipe Variations
Once you’ve nailed the basic version, here’s how to mix it up. I love experimenting with these flavors.
Elderberry & Turmeric Syrup
Add 1 teaspoon of turmeric powder and a pinch of black pepper to the simmering step. Turmeric is a powerful anti-inflammatory. The pepper helps your body absorb it. It adds an earthy, golden hue. Great for joint health.
Elderberry & Orange Zest
Add the zest of one orange to the pot while simmering. The citrus brightens the heavy berry flavor and adds a vitamin C boost. It tastes like a spa day in a jar.
Vegan Sweetener Swap
If you’re avoiding honey, use agave nectar or maple syrup. Agave has a neutral taste and mixes well. Maple syrup adds a distinct flavor that pairs beautifully with the ginger. Note that agave and maple syrup don’t have the same antimicrobial properties as honey, so it’s slightly less medicinal, but still delicious.
Spicy Kick Version
Add a small piece of cayenne pepper or increase the ginger to 5 inches. This is for when you really need to sweat out a cold. It’s intense but effective.
Serving & Storage
How to Serve It
I take 1 tablespoon straight from the spoon when I feel a cold coming on. It’s potent and effective. For daily maintenance, I mix 1 tablespoon into a mug of hot water with a squeeze of lemon. It makes a lovely afternoon tea. I also drizzle it over my morning oatmeal or mix it into my fluffy Japanese souffle pancakes for a festive touch.
Storage Life
This syrup keeps beautifully in the refrigerator. Store it in an airtight glass jar for up to 3 months. The honey acts as a natural preservative. If you notice any mold or off-smell, toss it. It shouldn’t smell like alcohol or yeast. If it does, it’s fermenting.
Freezing
You can freeze this syrup. Pour it into ice cube trays and freeze. Once solid, pop the cubes into a freezer bag. This is perfect for making single servings of hot tea quickly. It keeps for 6 months in the freezer.
Nutrition Information
I’m not a nutritionist, but here’s the general breakdown per tablespoon (assuming a yield of 16 tablespoons):
| Nutrient | Amount |
|---|---|
| Calories | 60 |
| Total Fat | 0g |
| Total Carbohydrates | 16g |
| Sugars | 15g |
| Protein | 0g |
| Sodium | 2mg |
My Take: This is sweet, so portion control matters. But the benefits of elderberries and honey outweigh the sugar content for most people. It’s a treat that helps you heal. If you’re diabetic or strictly limiting sugar, consult your doctor before using honey regularly.
Final Thoughts
Making this Immune-Boosting Elderberry Syrup with Ginger and Honey is one of those small acts of self-care that pays off massively. It’s not about being perfect; it’s about being prepared. When the winter winds howl, having a jar of this dark, spicy sweetness on your counter gives me peace of mind. It reminds me that nature has our back, if we just take the time to listen to it. I hope this recipe brings warmth and wellness to your home. Give it a try, and let me know how it tastes!
FAQs
Can I use fresh elderberries?
I strongly advise against using fresh elderberries. They contain cyanogenic glycosides, which can release cyanide if not cooked properly. Dried elderberries are safer and more concentrated. If you forage fresh ones, you must boil them for at least 30 minutes, but buying dried is just easier and safer.
How much elderberry syrup should I take?
For daily immune support, 1 tablespoon per day is standard. When you feel a cold coming on, you can increase this to 1 tablespoon every 2-3 hours for a few days. Always start with a smaller dose to see how your stomach reacts.
Can I make this without honey?
Yes, but it changes the texture and preservation. Agave nectar is the best substitute. Maple syrup works too but has a stronger flavor. Without honey’s natural preservatives, the syrup will spoil faster, so keep it in the fridge and use it within 2-3 weeks.
Why is my syrup cloudy?
Cloudiness is normal, especially if you didn’t strain it super finely. It just means there are some tiny particles of fruit or ginger left. It doesn’t affect the taste or safety. For a clearer syrup, strain it through a coffee filter or cheesecloth.
Is this safe for children?
Yes, this is generally safe for children over the age of 1. Do not give honey to infants under 1 year old due to the risk of botulism. For older kids, half a teaspoon to 1 teaspoon is a good starting dose. It tastes like berry jam to them, so they usually love it.
Pin This Recipe!
Perfect Immune-Boosting Elderberry Syrup: Cozy Ginger Honey Remedy
- Total Time: 45 minutes
- Yield: 16 servings 1x
Description
A simple, natural, and effective homemade elderberry syrup infused with ginger, honey, and spices to support the immune system during cold and flu season.
Ingredients
- 1 cup (115g) dried elderberries
- 1 cup (340g) raw honey
- 1 large knob fresh ginger root (approx. 3 inches / 50g), peeled and chopped
- 2 cups (475ml) water
- 1 whole cinnamon stick (3 inches)
- 1/2 teaspoon whole black peppercorns
Instructions
- In a medium saucepan, combine dried elderberries, water, chopped ginger, cinnamon stick, and black peppercorns.
- Bring the mixture to a boil over high heat, then immediately reduce heat to low.
- Simmer gently for 20 minutes until the liquid turns deep purple and reduces slightly.
- Remove from heat and remove the cinnamon stick.
- Mash the elderberries with a masher or fork to release juices and let the mixture steep, covered, for 15 minutes.
- Strain the liquid through a fine-mesh strainer into a bowl, pressing firmly on solids to extract all liquid. Discard solids.
- Let the liquid cool until warm to the touch (not hot) to preserve honey enzymes.
- Stir in raw honey until completely dissolved.
- Pour into a clean glass jar and seal tightly.
Notes
Do not use fresh elderberries as they contain toxic cyanogenic glycosides unless cooked thoroughly; dried are safer. Do not add honey to boiling liquid as it destroys beneficial enzymes. Store in the refrigerator for up to 3 months or freeze in ice cube trays for up to 6 months. Strain twice if a clearer syrup is desired.
- Prep Time: 10 minutes
- Cook Time: 35 minutes
- Category: Beverages
- Cuisine: American
Nutrition
- Serving Size: 1 tablespoon
- Calories: 60
- Sugar: 15
- Sodium: 2
- Carbohydrates: 16
Keywords: elderberry syrup, immune boost, ginger honey remedy, natural cold remedy, homemade syrup, anti-inflammatory, winter wellness


