I still remember the first Labor Day I hosted after moving into our house. I was so eager to prove I could handle a dinner party that I planned an elaborate three-course meal, complete with a soufflé that I was convinced would rise to perfection. It did not. Instead, I was left standing in my kitchen at 6:30 PM, sweating through my apron, holding a sad, collapsed dome of egg whites while my guests sat at the table waiting. I panicked. I opened the fridge, stared at a block of cream cheese, some graham crackers, and a jar of berry jam, and decided to just throw something together. I didn’t even have time to bake anything.
That panic-born dessert—basically a deconstructed cheesecake served on plates with a side of existential dread—turned out to be the most popular item on the table. People loved it. They asked for the recipe. And honestly? It was delicious. But it was messy, it was messy, and it lacked the polish I wanted for a holiday that celebrates the end of summer.
Fast forward to last year. I was hosting again, but this time I wanted something that looked festive, tasted incredible, and didn’t require me to stand over a hot oven while my guests were already eating. I stumbled upon the idea of no-bake cheesecake bars, but I wanted to make it special. Specifically, I wanted it to feel like Labor Day. So, I started experimenting with red, white, and blue layering. I wanted that iconic “Star Spangled” look without the hours of piping or the risk of cracking.
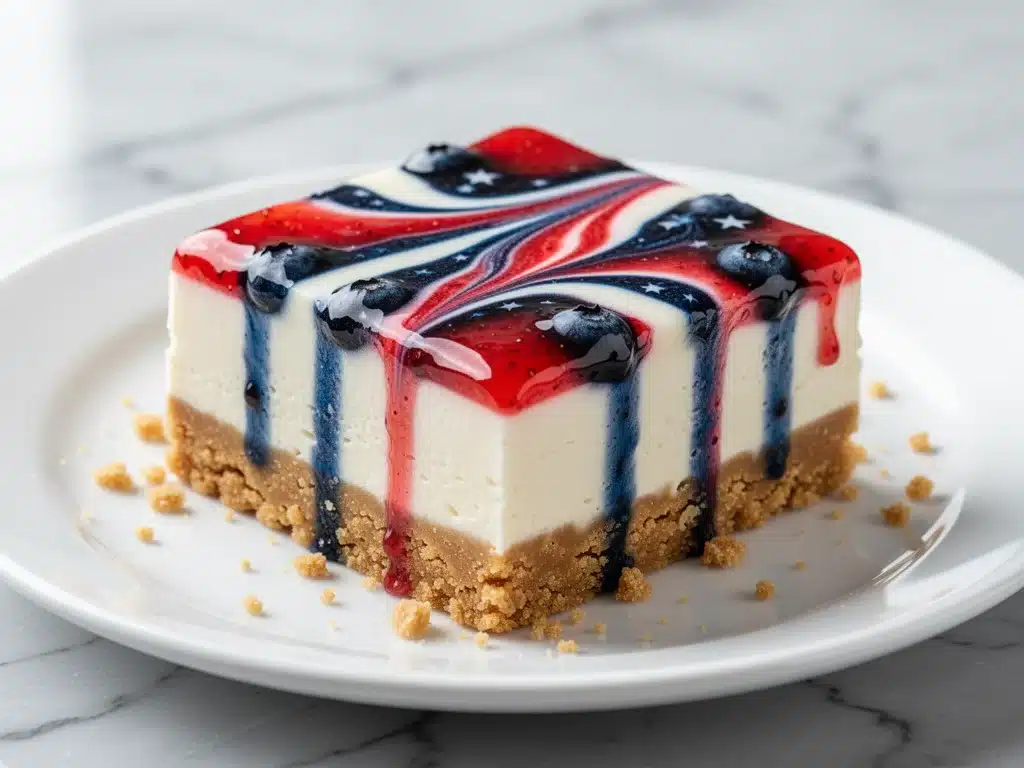
What I created was the Labor Day No-Bake Star Spangled Cheesecake Bars you’ll make on repeat. They are sturdy enough to cut into neat squares, pretty enough to display on a tiered stand, and creamy enough to make your friends ask if you hired a professional baker. The best part? They set in the fridge while you’re grilling burgers or chatting with your neighbors. Zero oven heat, maximum flavor, and a presentation that screams “I put thought into this.” Once you try this one, you’ll forget all about those complicated baked cheesecakes that take forever to cool.
Why You’ll Love These No-Bake Bars
There are about a dozen reasons why these bars have replaced every other dessert I make for summer holidays, but let’s be real—here are the big ones that will sell you on making them this weekend.
Zero Oven Heat — Seriously, this is the game-changer. Labor Day is usually the last hurrah of summer grilling season. The last thing you want is to turn on your oven and heat up your entire kitchen. These bars require absolutely no baking. You mix, you layer, you chill. Your kitchen stays cool, and your guests stay happy.
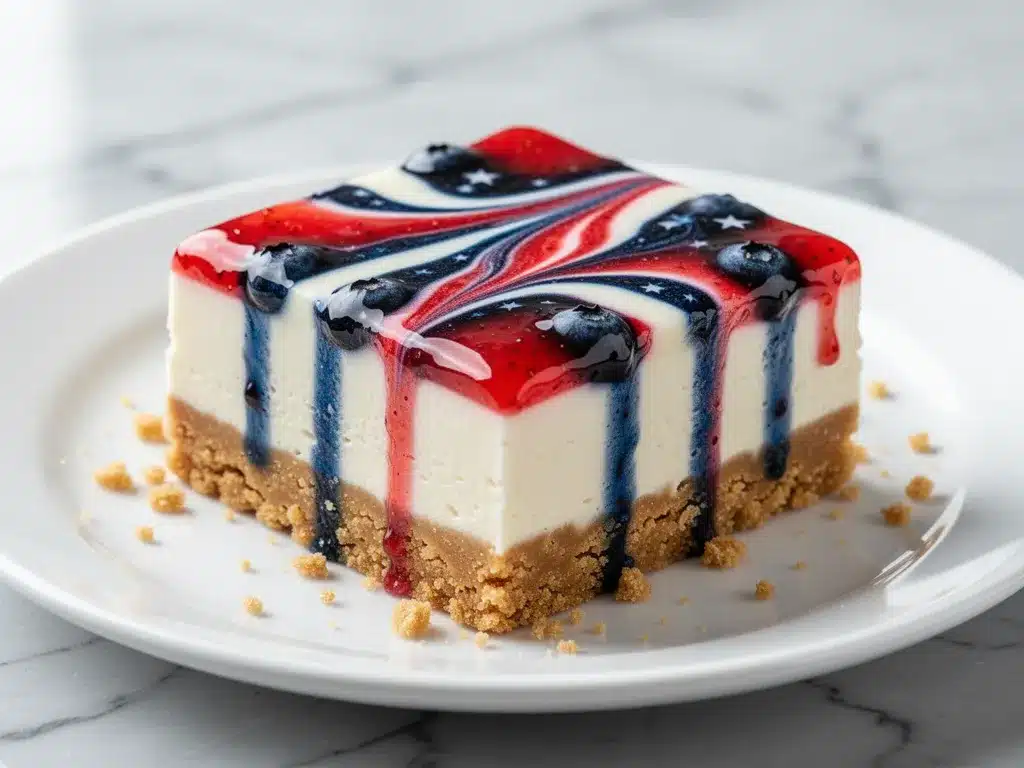
Actually Looks Fancy — I know, I know. “No-bake” sometimes sounds like “lazy.” But these bars? They look like you spent hours in a pastry shop. The white cream cheese layer contrasts beautifully with the red berry swirl and the blueberry compote accents (or just the white and red if you want to keep it simple). The star-shaped cookie crust adds a fun, festive texture that elevates it from “snack” to “dessert course.”
Make-Ahead Friendly — This is my secret weapon for stress-free hosting. You can assemble these bars the night before. In fact, they taste better the next day because the flavors have had time to meld and the layers have set firmly. I often make them on Saturday afternoon, so Sunday evening is just about plating and pouring drinks.
Crowd-Pleasing Flavor — The combination of tangy cream cheese, sweet buttery crust, and tart berries is a classic for a reason. It’s not too heavy, it’s not overly sweet, and it pairs perfectly with coffee or a glass of dessert wine. I’ve served these to picky eaters and foodies alike, and the only complaint I ever get is “Can I have another slice?”
Easy to Customize — Love strawberries but hate blueberries? Swap the blue compote for a strawberry drizzle. Want to add a hint of lemon? Add zest to the cream cheese layer. This recipe is a canvas, not a constraint. It’s forgiving, flexible, and incredibly easy to tweak to your family’s tastes.
This is my go-to when I need a dessert that looks impressive but requires minimal effort. No baking skills needed, no specialized equipment, just reliable, delicious food that makes everyone happy.
Ingredients You’ll Need
Here’s the best part: you probably have most of these ingredients already. This isn’t a recipe that requires a special trip to three different specialty stores. It’s pantry-friendly with just a few fresh touches.
For the Star-Shaped Crust:
Graham cracker crumbs (2 cups / 200g) — I use regular graham crackers, not the sweetened honey ones if you want less sweetness, but honey works fine if you like it sweeter. You can crush them in a food processor or put them in a bag and whack them with a rolling pin. I like to use star-shaped graham crackers if I can find them, but regular crumbs work perfectly fine too.
Unsalted butter (1/2 cup / 113g, melted) — This binds the crust. Use real butter, not margarine. It makes a huge difference in flavor and texture. Melt it in the microwave or a small saucepan.
Granulated sugar (2 tablespoons / 25g) — Just a little bit to sweeten the crust and help it crisp up slightly.
Cinnamon (1/2 teaspoon) — Optional, but it adds a warm, cozy note that pairs beautifully with the berries. I always add it.
For the Cream Cheese Filling:
Full-fat cream cheese (24 oz / 680g) — This is non-negotiable. Use the brick kind, not the spreadable stuff in the tub. It needs to be full-fat for that rich, stable texture. Let it sit out for 30 minutes before you start so it’s soft enough to beat.
Heavy whipping cream (2 cups / 480ml) — Cold! Very cold. You’re going to whip this into stiff peaks, so if it’s warm, it won’t hold its shape. I keep mine in the fridge until the last minute.
Confectioners’ sugar (1 cup / 120g) — Sifted, please. You don’t want little lumps of sugar in your smooth cheesecake filling. It dissolves better and gives you that silky finish.
Vanilla extract (2 teaspoons) — Use real vanilla. I know it’s pricier, but the flavor is worth every penny. I use pure vanilla bean paste sometimes for a speckled look, but extract works great too.
For the Red, White, and Blue Swirls:
Strawberry jam or preserves (1/2 cup / 150g) — I like a chunky jam for the red swirl. It gives little bursts of fruit flavor. If you can’t find strawberry, raspberry works too.
Blueberry jam or compote (1/2 cup / 150g) — For the blue layer, you can use store-bought blueberry jam or make a quick compote by simmering frozen blueberries with a little sugar. Store-bought is easier, but homemade tastes fresher.
Optional: Fresh berries — For garnish. A few fresh strawberries and blueberries on top make it look professional.
Equipment Needed
You don’t need fancy equipment for this. Here’s what I actually use.
9×13-inch baking pan — I use a glass Pyrex pan because I like to see the layers. A metal pan works too, but glass helps me monitor the bottom crust. Line it with parchment paper for easy lifting later.
Electric mixer — Hand mixer or stand mixer. You need this to whip the cream cheese and heavy cream properly. Doing this by hand is possible but takes serious arm strength and time. I’m lazy; I use a mixer.
Large mixing bowls — One for the cream cheese mixture, one for whipping the cream. Make sure they’re cold if possible.
Spatula — A flexible silicone spatula is essential for folding the whipped cream into the cream cheese without deflating it. I have a few, and I always use the same one for this.
Piping bags or ziplock bags — If you want those pretty swirls, fill a ziplock bag with jam and snip off a tiny corner. It’s like a makeshift piping bag. No fancy tips needed.
Star-shaped cookie cutter — Optional, but fun. I use this to cut stars out of the graham cracker crust before pressing it in, or to cut stars out of the finished bars for extra flair. It adds that “Star Spangled” vibe.
Whisk — For beating the cream cheese until smooth.
Measuring cups and spoons — Standard stuff. Dollar store versions work fine.
How to Make It: Step-by-Step
Alright, let’s make this! I’m walking you through exactly how I do it, including the little tricks I’ve picked up.
Step 1: Prep Your Pan and Crust (10 minutes)
Line your 9×13-inch pan with parchment paper, leaving an overhang on the long sides. This is crucial for lifting the bars out later. If you don’t do this, you’ll be digging for pieces with a knife, and that’s messy. Mix the graham cracker crumbs, melted butter, sugar, and cinnamon in a bowl until it looks like wet sand. Press this mixture firmly and evenly into the bottom of the pan. Use the bottom of a measuring cup to pack it down tight. A loose crust = crumbly bars. I want neat squares. Chill the crust in the fridge while you make the filling.
Step 2: Whip the Cream Cheese Mixture (5 minutes)
In a large bowl, beat the softened cream cheese on medium-high speed until it’s completely smooth and creamy. No lumps! This takes about 2-3 minutes. Scrape down the sides of the bowl. Add the sifted confectioners’ sugar and vanilla extract. Beat on low until combined, then increase to medium-high and beat for another 2 minutes until it’s fluffy. Be careful not to overbeat at this stage, or you might incorporate too much air too early.
Step 3: Whip the Heavy Cream (3 minutes)
In a separate cold bowl, whip the heavy cream on high speed until stiff peaks form. This means when you lift the beaters, the cream stands up straight. It should look like whipped topping. This usually takes 2-3 minutes. Don’t over-whip it into butter, though. Stop as soon as peaks form.
Step 4: Fold It All Together (2 minutes)
Gently fold the whipped cream into the cream cheese mixture. Use your spatula and cut down the middle, scoop up the bottom, and fold over. Rotate the bowl and repeat. Do this until there are no more white streaks. Be gentle! You want to keep the air in the mixture for that light, fluffy texture. It should look like a thick, fluffy mousse.
Step 5: Spread and Chill (1 hour)
Spread the cheesecake mixture evenly over the chilled crust. Smooth the top with your spatula. Cover the pan with plastic wrap and refrigerate for at least 1 hour, or until the layer is firm to the touch. This sets the base layer so the swirls don’t mix in immediately.
Step 6: Add the Red, White, and Blue Swirls (5 minutes)
Now for the fun part. Take your strawberry jam and blueberry jam (or compote). Put them in separate ziplock bags and snip off a tiny corner. Drizzle the red jam in zig-zags across the white cheesecake layer. Then, drizzle the blue jam in the opposite direction, creating a grid or star-like pattern. You can also use a toothpick to gently swirl the jams into the cream cheese for a marbled effect. I prefer the distinct stripes for a cleaner look. For extra flair, use a small star-shaped cutter to cut out stars from the remaining graham cracker crumbs or even from a sheet of graham crackers and place them on top.
Step 7: Set and Slice (30 minutes)
Return the pan to the fridge for at least 30 more minutes to let the jams set slightly. When you’re ready to serve, lift the bars out using the parchment paper overhang. Use a sharp, warm knife to cut into squares. Wipe the knife between cuts for clean edges. Garnish with fresh berries if you like.
Total Time: About 2 hours (including chilling), with only 20 minutes of active work.
Expert Tips & Tricks
Here’s everything I’ve learned from making these dozens of times. These tips will save you from my mistakes.
Keep Everything Cold
The secret to stable whipped cream is temperature. Keep your cream cheese, heavy cream, and bowls cold. If your kitchen is hot, put your mixing bowl in the fridge for 10 minutes before whipping. This ensures your peaks hold up and your bars don’t melt into a soup.
Sift Your Sugar
Confectioners’ sugar often has clumps. Sifting it into the cream cheese mixture prevents gritty spots in your smooth filling. It’s an extra step, but it makes the texture perfect.
Don’t Skip the Chill Time
I know you want to eat them immediately. But the cheesecake layer needs time to set. If you cut into it too soon, it’ll be soft and messy. The hour-long chill is non-negotiable for neat bars.
Warm Knife for Clean Cuts
Dip your knife in hot water and wipe it dry before each cut. This helps the knife glide through the cold cream cheese without dragging or squishing the layers. It makes for those Instagram-worthy clean squares.
Use Thick Jam
If your jam is too runny, it will bleed into the cream cheese and make it discolored. Use thick preserves or reduce your compote on the stove until it’s jam-like. This keeps the colors distinct and vibrant.
Common Mistakes (and how to avoid them):
Mistake: Lumpy cream cheese. Fix: Beat the cream cheese longer before adding sugar. Make sure it’s fully softened to room temperature.
Mistake: Deflated filling. Fix: Don’t overmix when folding. Use a gentle hand. And make sure your cream is whipped to stiff peaks, not soft peaks.
Mistake: Soggy crust. Fix: Press the crust firmly and chill it before adding the filling. Don’t let the bars sit at room temperature for more than 2 hours before serving.
Variations & Substitutions
Once you’ve nailed the basic version, here’s how you can mix it up. I’ve tried all of these.
Lemon Berry Version
Add the zest of 2 lemons to the cream cheese mixture. Swap the blueberry jam for a raspberry lemon curd. It’s brighter and more tangy. Perfect for spring too.
Chocolate Drizzle
Skip the blue jam and drizzle melted dark chocolate over the top in a zig-zag pattern. Add a sprinkle of sea salt. It’s rich and decadent.
Red Velvet Twist
Add red food coloring to the cream cheese mixture for a red base, then swirl white vanilla cream and blueberry jam. It looks like a flag. Very patriotic.
Gluten-Free
Use gluten-free graham crackers or almond flour for the crust. Everything else is naturally gluten-free. I’ve used gluten-free graham crackers from major brands and they work great.
Dairy-Free
Replace cream cheese with a dairy-free block-style alternative (like Kite Hill) and heavy cream with coconut cream (chilled overnight, scoop the solid part). It’s richer and has a coconut flavor, but it sets well. My dairy-free friend loves this version.
Different Berries:
Use blackberry jam for a darker purple swirl. Use peach preserves for a summer twist. The technique works with any thick fruit preserve.
Serving & Storage
How to Serve:
I usually serve these chilled, straight from the fridge. They look rustic and stay cool. Here are other ways I’ve enjoyed them:
Side Dishes:
- Grilled corn on the cob
- Watermelon slices
- Sparkling water with mint and lime
- Iced tea or lemonade
Toppings Bar:
When I have guests, I put out: fresh strawberries, blueberries, whipped cream, and chocolate shavings. Everyone customizes their slice.
Storage Instructions:
Refrigerator:
Store in an airtight container or covered with plastic wrap for up to 5 days. They actually taste better on day 2 as the flavors meld. Keep them cold at all times.
Freezing:
Yes, these freeze well! Wrap individual bars tightly in plastic wrap, then in foil. Freeze for up to 2 months. Thaw in the fridge overnight. The texture remains creamy and delicious.
Pro tip:
If you’re making these for a picnic, keep them in a cooler with ice packs. The cream cheese filling can soften quickly in the heat, so temperature control is key for outdoor events.
Nutrition Information
I’m not a nutritionist, but here’s the breakdown if you’re tracking. Note that these are estimates based on standard ingredients.
Per Serving (based on 12 bars):
- Calories: 320
- Protein: 4g
- Carbs: 28g
- Fiber: 1g
- Sugar: 22g
- Fat: 22g
- Saturated Fat: 13g
- Cholesterol: 60mg
- Sodium: 180mg
What’s Good:
- Provides some calcium from the cream cheese
- Antioxidants from the berries
- Easy to portion control (they’re small bars)
What to Know:
- Higher in calories and fat from the cream cheese and butter
- Contains dairy and gluten
- Moderate sugar content from the jam and sugar
My Take:
Look, this is a dessert. It’s sweet, it’s creamy, and it’s meant to be enjoyed. It’s not a health food, but it’s not a guilt-trip either. A little slice goes a long way. When I want to make it lighter, I use a lighter cream cheese and less jam. But usually? I just enjoy it with friends and family.
Final Thoughts
So that’s my go-to Labor Day No-Bake Star Spangled Cheesecake Bars! I’ve probably talked your ear off at this point, but when you make a recipe this often, you have a lot to say about it.
This has saved my holiday desserts more times than I can count. It’s my answer to “what’s for dessert” when I’m tired, don’t want to bake, and still want something that looks beautiful. My kids are happy, my guests are impressed, and I’m happy because I’m not stressed about cooking.
Make it yours! Try different berry combinations, swap in your favorite jam, or add a hint of citrus. The best recipes are the ones you adapt to your family’s tastes. If you make this, drop a comment and let me know what you think! I love hearing how recipes turn out in your kitchen. And if something doesn’t work, tell me that too—I’m here to help troubleshoot.
Happy cooking! And I hope your kitchen smells half as good as mine does right now (well, maybe not, since there’s no baking, but it will smell like happy people eating dessert).
Frequently Asked Questions
Can I use whipped topping instead of heavy cream?
You can, but the texture will be different. Whipped topping (like Cool Whip) is lighter and less rich. It will work, but the cheesecake won’t have that dense, creamy mouthfeel. I recommend using real heavy cream for the best results. If you must use whipped topping, make sure it’s thawed and folded in gently.
Why did my cheesecake filling deflate?
This usually happens if you overmixed the cream cheese or if you folded the whipped cream too vigorously. Beat the cream cheese until smooth, but don’t whip it too much. When folding the whipped cream, use a gentle hand. Cut down the middle and fold over. Rotate and repeat. Stop as soon as it’s combined.
Can I make these ahead of time?
Absolutely! In fact, they’re better made ahead. You can assemble them up to 2 days in advance. Just keep them covered in the fridge. If you’re freezing them, you can make them up to 2 months ahead. Thaw in the fridge overnight before serving.
Do I have to use graham crackers?
No! You can use vanilla wafers, digestive biscuits, or even crushed Oreos (remove the cream first). The crust base is flexible. Just adjust the sugar in the crust if your cookies are sweeter.
Can I use fresh berries instead of jam?
You can, but fresh berries have a lot of water content. If you use fresh berries, mash them slightly and cook them down with a little sugar to make a compote, then let it cool completely. If you just drop raw berries on top, they’ll release juice and make the cream cheese soggy. Jam or compote is safer for the layers.
How do I store leftover bars?
Store them in an airtight container in the refrigerator for up to 5 days. If you’re bringing them to a picnic, keep them in a cooler with ice packs to prevent melting.
Can I double this recipe?
Yes! Double all the ingredients and use a 9×13-inch pan. If you want to make a huge batch, you can use a 10×15-inch jelly roll pan, but the layers will be thinner. Adjust the chilling time accordingly.
Pin This Recipe!
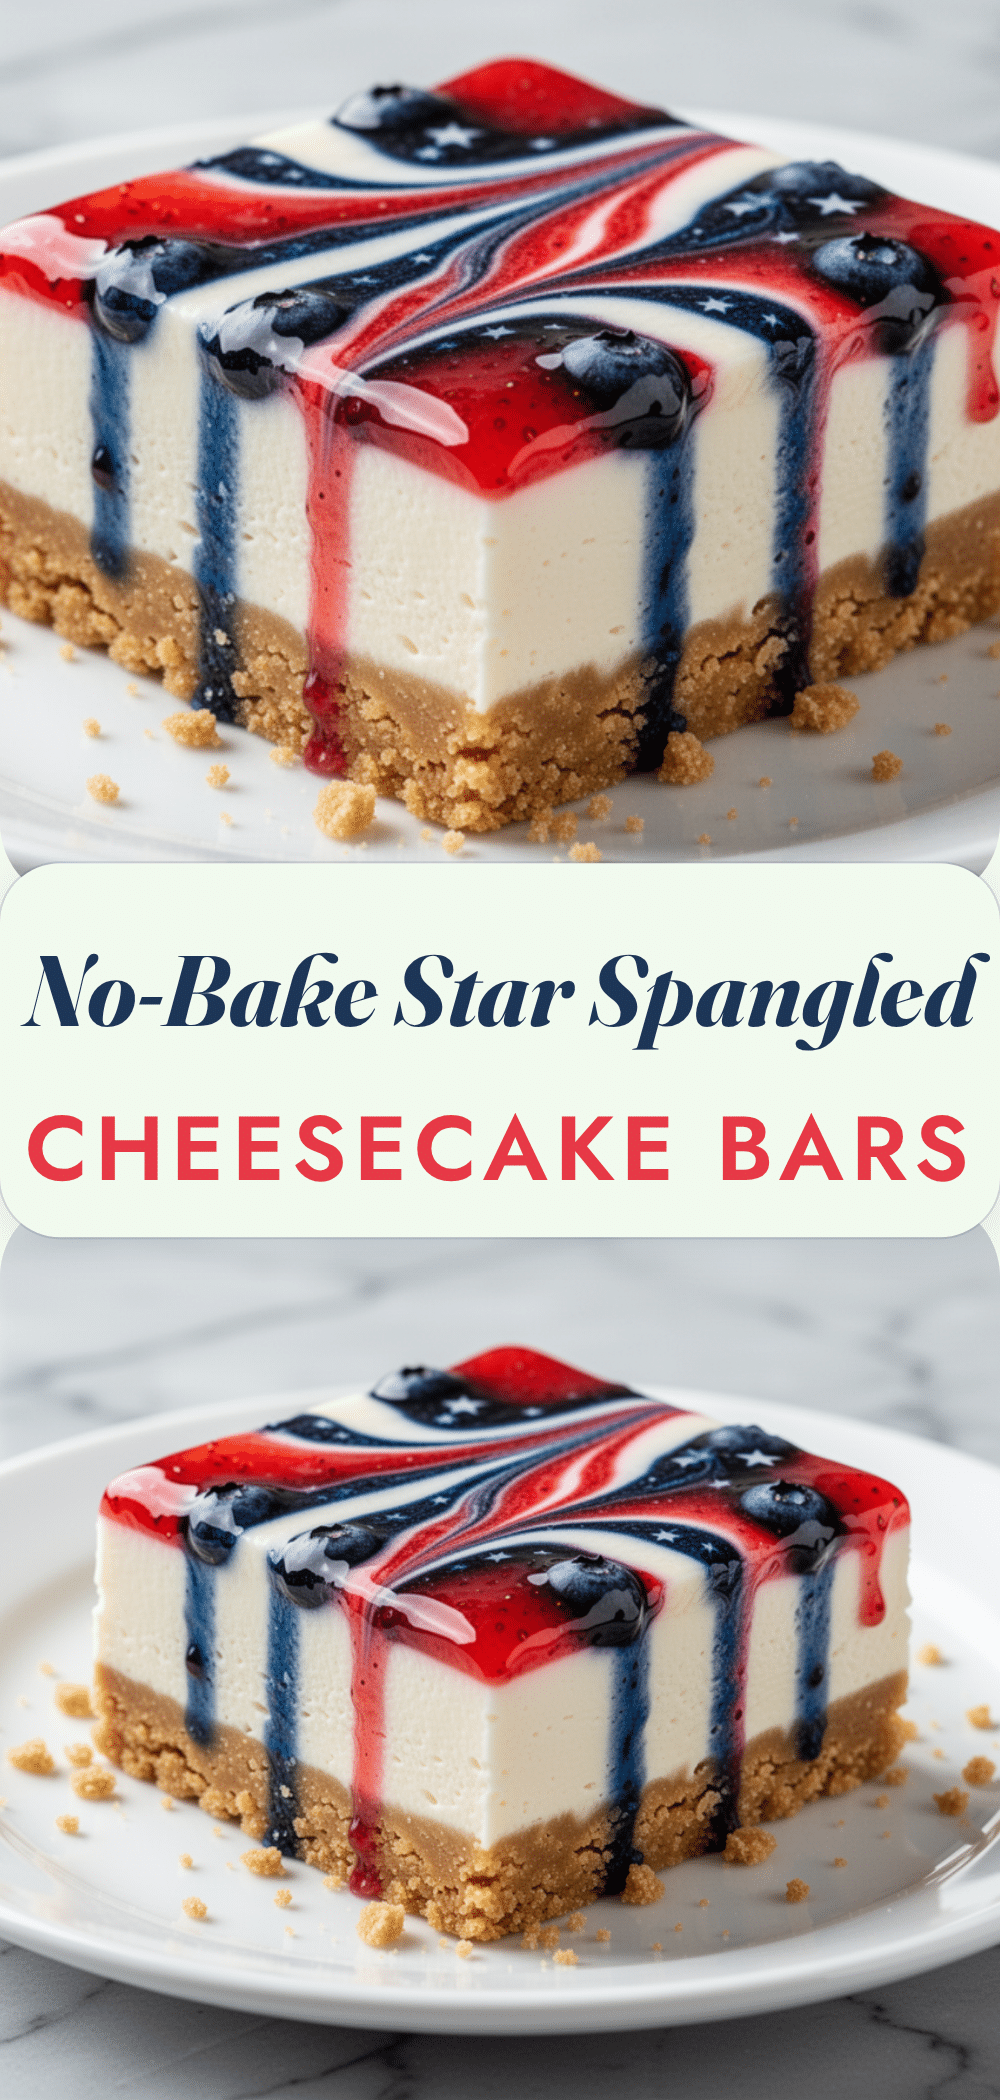
Labor Day No-Bake Star Spangled Cheesecake Bars
- Total Time: 2 hours
- Yield: 12 servings 1x
Description
A festive, no-bake cheesecake dessert featuring a star-shaped graham cracker crust and layers of creamy cheesecake with red, white, and blue berry swirls. Perfect for summer holidays with zero oven heat required.
Ingredients
- 2 cups (200g) graham cracker crumbs
- 1/2 cup (113g) unsalted butter, melted
- 2 tablespoons (25g) granulated sugar
- 1/2 teaspoon cinnamon
- 24 oz (680g) full-fat cream cheese, softened
- 2 cups (480ml) heavy whipping cream, cold
- 1 cup (120g) confectioners’ sugar, sifted
- 2 teaspoons vanilla extract
- 1/2 cup (150g) strawberry jam or preserves
- 1/2 cup (150g) blueberry jam or compote
- Fresh berries for garnish (optional)
Instructions
- Line a 9×13-inch baking pan with parchment paper, leaving an overhang on the long sides.
- Mix graham cracker crumbs, melted butter, sugar, and cinnamon in a bowl until it resembles wet sand.
- Press the crust mixture firmly and evenly into the bottom of the pan. Chill in the fridge.
- In a large bowl, beat the softened cream cheese on medium-high speed until smooth (2-3 minutes).
- Add sifted confectioners’ sugar and vanilla extract. Beat on low until combined, then medium-high for 2 minutes until fluffy.
- In a separate cold bowl, whip the heavy cream on high speed until stiff peaks form.
- Gently fold the whipped cream into the cream cheese mixture using a spatula until no white streaks remain.
- Spread the cheesecake mixture evenly over the chilled crust. Cover and refrigerate for at least 1 hour until firm.
- Place strawberry and blueberry jams in separate ziplock bags and snip off a tiny corner.
- Drizzle the jams in zig-zags or grids across the white cheesecake layer. Optionally swirl with a toothpick.
- Return to the fridge for at least 30 more minutes to set.
- Lift bars out using parchment overhang. Cut into squares with a warm, sharp knife. Garnish with fresh berries if desired.
Notes
Keep all ingredients and bowls cold to ensure the whipped cream holds its shape. Sift confectioners’ sugar to prevent lumps. Use thick jam to prevent bleeding into the cream cheese layer. For clean cuts, dip a sharp knife in hot water and wipe dry between cuts. These bars can be made up to 2 days in advance or frozen for up to 2 months.
- Prep Time: 20 minutes
- Cook Time: 0 minutes
- Category: Dessert
- Cuisine: American
Nutrition
- Serving Size: 1 bar
- Calories: 320
- Sugar: 22
- Sodium: 180
- Fat: 22
- Saturated Fat: 13
- Carbohydrates: 28
- Fiber: 1
- Protein: 4
Keywords: no-bake cheesecake, labor day dessert, star spangled bars, summer dessert, red white and blue, graham cracker crust, berry swirl


