It was 3:15 PM on a Tuesday, and I was staring at the wall. You know that feeling? The kind where your brain feels like it’s wrapped in wet cotton, and the only thing keeping you upright is the third cup of coffee you swear you didn’t need. My daughter was doing homework at the kitchen table, looking equally defeated by long division, and I knew I needed something. Not a snack that would make me crash harder in an hour, but something that felt like a hug from the inside out.
I reached for the jar of store-bought cookies. They were dry. Crumbly. The chocolate chips were scattered like sad little islands in a sea of processed sugar. I put them back. Instead, I decided to make these Easy Chewy Brown Butter Chocolate Chip Cookies. It sounds like a lot of work for a midday slump, but here’s the truth: browning butter is just letting butter talk to you for ten minutes. It’s active sitting. It’s therapeutic.
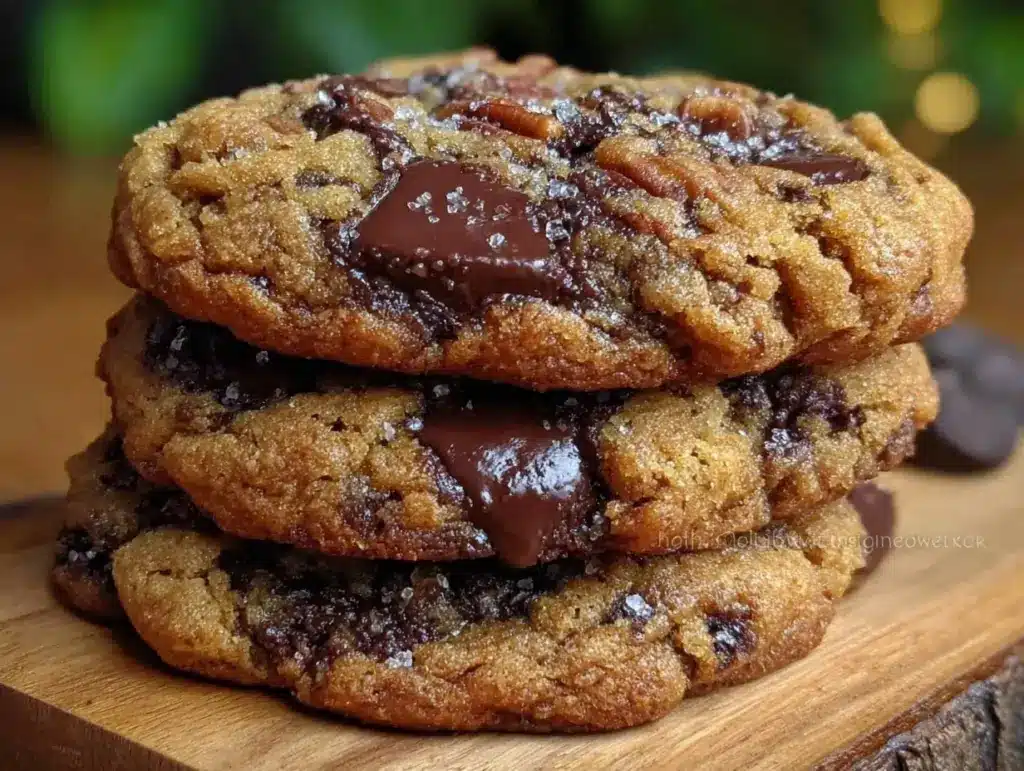
When I pulled that first batch out of the oven, the smell hit me first—nutty, toasted, deep. It smelled like comfort. I ate one warm, the center still soft and gooey, and felt my shoulders drop three inches. It wasn’t just sugar; it was fat, protein, and complex carbs working together to give me the energy I actually needed. These aren’t those dry, diet-friendly bars that taste like cardboard. These are Easy Chewy Brown Butter Chocolate Chip Cookies that fuel your day without feeling like a diet compromise. They’re rich, they’re satisfying, and they’re the only thing that gets me through the 4 PM wall.
I’ve made this recipe at least twelve times in the last six months. Sometimes I add walnuts. Sometimes I swap half the white flour for oat flour for extra fiber. But the core remains the same: perfect chew, crispy edges, and that incredible brown butter flavor that makes you stop and close your eyes. If you’re looking for a way to power through your afternoon without the crash, this is your answer.
Why You’ll Love This Recipe
There’s a reason this Easy Chewy Brown Butter Chocolate Chip Cookies recipe has become my non-negotiable weekend project and my midweek savior. It’s not just about taste; it’s about how it makes you feel when you’re in the kitchen and when you’re eating it.
- Deepest Flavor Possible — Browning butter changes everything. You’re caramelizing the milk solids, which adds a nutty, almost toffee-like depth that regular melted butter just can’t match. I tested this against regular butter cookies, and the brown butter version won by a landslide. It tastes like you spent hours on it, but you didn’t.
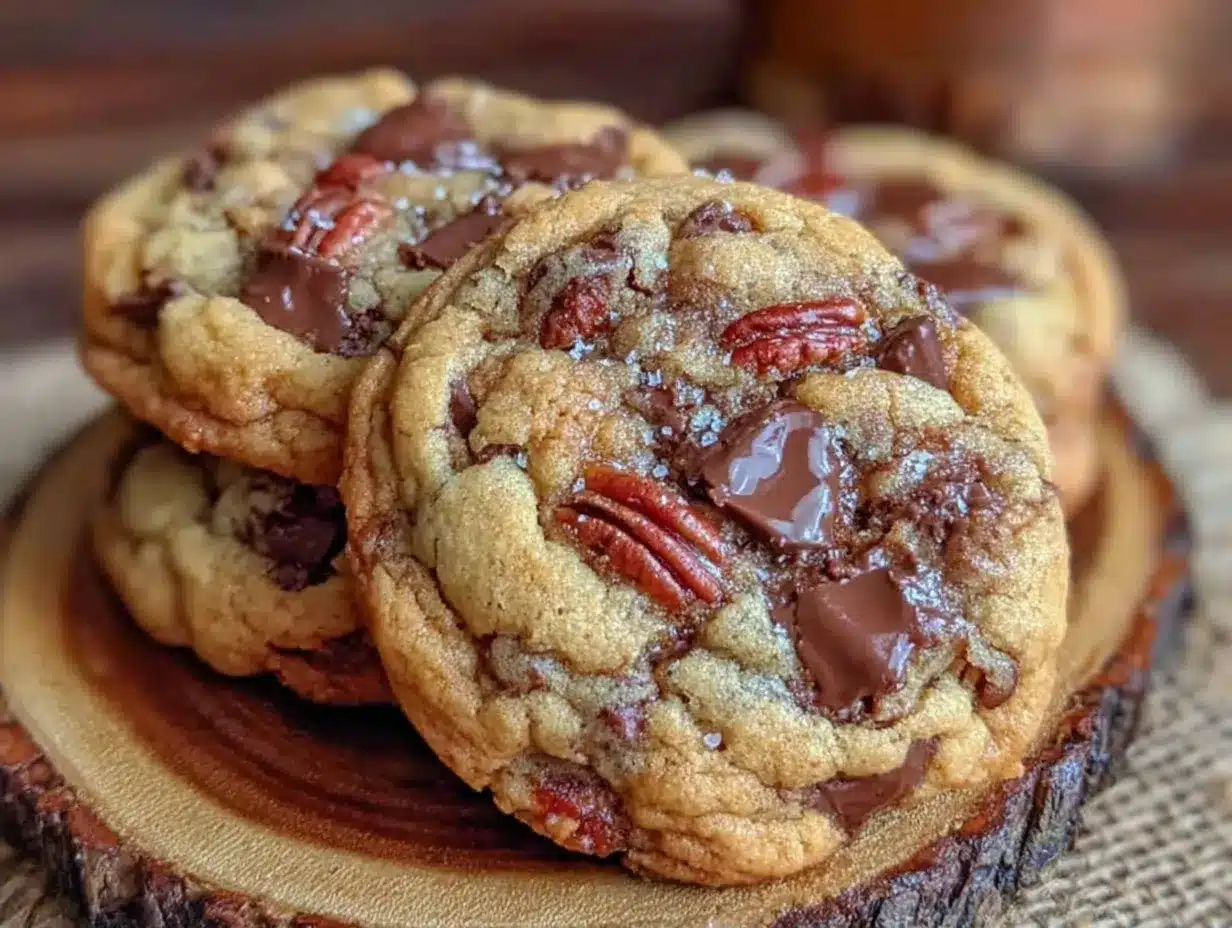
- Actual Texture Contrast — Most cookie recipes promise chewy but deliver cakey. These have crispy, caramelized edges and a center that is soft, fudgy, and chewy. I learned this the hard way by underbaking my first batch until they were soupy. Now, I pull them when they look slightly underdone, and they set perfectly as they cool.
- Fuel That Lasts — I use a mix of white and brown sugar, plus a touch of oat flour in my variations. This gives you complex carbohydrates and fiber alongside the fat from the butter and chocolate. It’s not just empty calories; it’s sustained energy. I eat one of these with a glass of milk, and I’m good for another two hours of productivity.
- Pantry Staple Friendly — You likely have most of this in your kitchen. Butter, sugar, eggs, flour, chocolate chips. The only special step is the butter browning, which requires zero special tools. It’s the easiest upgrade you can make to a standard chocolate chip cookie.
- Meal Prep Magic — These freeze beautifully. I bake a double batch on Sunday, freeze the dough balls, and bake fresh ones on Tuesday or Thursday nights. It feels like magic to pull a warm cookie out of the freezer stash on a random Wednesday. It’s like having a personal bakery on demand.
- Kid-Approved but Adult-Respected — My daughter loves them, but she also knows they’re “special” because of the brown butter. It’s a subtle difference that makes them feel gourmet. It’s a great way to get kids involved in baking because browning butter is visually engaging—they can see the color change from yellow to golden brown.
This is my go-to when I need a boost, when I need to share something special with neighbors, or when I just need a moment of peace in the kitchen.
Key Ingredients
Let’s talk about what goes into these Easy Chewy Brown Butter Chocolate Chip Cookies. I’m specific about measurements because baking is chemistry, but I’m flexible about brands because life is busy. Here’s what you need and why it matters.
Unsalted Butter (1 cup / 226g)
This is the star. You need high-quality butter. I use Kerrygold or Land O’Lakes. The fat content matters here. You’re going to brown this butter, which means you’re toasting the milk solids. If your butter has too much water, you’ll steam instead of toast. Start with cold butter so you have control over the melting process. Don’t use margarine; it will ruin the texture and flavor.
All-Purpose Flour (2 ¼ cups / 280g)
Standard AP flour gives you that classic cookie structure. I don’t recommend cake flour here because you want some chew, not tenderness. If you want to boost the nutritional profile, you can swap ½ cup of this for oat flour, which adds fiber and keeps the cookies soft. Just make sure your oat flour is finely ground.
Brown Sugar (1 cup / 200g, packed)
Moisture is your friend for chewiness. Brown sugar contains molasses, which adds moisture and a deep, caramel flavor. If you use only white sugar, your cookies will spread too thin and become crisp rather than chewy. Pack it tightly into the measuring cup for accuracy. I prefer dark brown sugar for a more intense molasses hit, but light brown works fine too.
Granulated Sugar (½ cup / 100g)
This provides structure and those crispy edges. The combination of white and brown sugar is what creates that perfect texture contrast. Don’t skip the white sugar; it helps the cookies hold their shape while the brown sugar keeps the center soft.
Large Eggs (2 large / ~100g without shells)
Eggs bind everything together and add richness. I always bring my eggs to room temperature before baking. Cold eggs can shock the butter and cause the dough to seize up. If you forget, just drop them in a bowl of warm water for five minutes. Two eggs is the sweet spot—more makes them cakey, less makes them greasy.
Vanilla Extract (2 tsp / 10ml)
Use real vanilla. I know it’s expensive, but vanilla extract is crucial for balancing the sweetness. I use Nielsen-Massey or Simply Organic. Vanilla extract is not the same as vanilla flavoring, which is synthetic and tastes chemical. Spend the extra dollar; your cookies will thank you.
Semi-Sweet Chocolate Chips (2 cups / 340g)
This is where you can get fancy or keep it simple. I buy Ghirardelli 60% Cacao chips for a balanced sweetness. Or, chop up a high-quality chocolate bar for irregular, melty chunks. If you want a more sophisticated flavor, try swapping half for dark chocolate chunks. The fat in the chocolate pairs beautifully with the nutty brown butter.
Baking Soda (1 tsp / 5g)
Baking soda helps the cookies spread and brown. It reacts with the acidic brown sugar to create lift. Make sure your baking soda is fresh. If it’s been in your cabinet for two years, it might not work. Test it by dropping a little in vinegar—it should fizz violently.
Fine Sea Salt (1 tsp / 5g)
Salt is not optional. It enhances the chocolate flavor and cuts through the sweetness. I use fine sea salt so it dissolves evenly into the dough. If you only have kosher salt, you’ll need to pack it more tightly. A final sprinkle of flaky sea salt on top after baking is a game-changer for texture and flavor.
Optional: Rolled Oats (½ cup / 40g)
For extra fiber and chew, I often add ½ cup of old-fashioned rolled oats. They don’t change the flavor much but add a nice heartiness. This is great if you’re using these as a breakfast-on-the-go fuel.
Tools Needed
You don’t need fancy equipment. Here’s what I use to make these Easy Chewy Brown Butter Chocolate Chip Cookies efficiently.
Medium Saucepan — I use a 2-quart stainless steel saucepan. You need something with a thick bottom to prevent the butter from burning. Clear glass allows you to see the color change, but stainless steel is more durable. Avoid non-stick pans for browning butter because you can’t see the milk solids clearly.
Heatproof Spatula — A silicone spatula is essential for scraping the brown butter into a bowl to stop the cooking process immediately. You don’t want residual heat to burn the butter.
Mixing Bowls — One large bowl for dry ingredients, one medium for wet. I use stainless steel bowls because they’re sturdy and easy to clean.
Baking Sheets — I use half-sheet pans (18×13 inches). If you use quarter-sheet pans, you’ll need to adjust your baking time slightly. Dark pans bake faster, so reduce the oven temperature by 25°F if you’re using them.
Parchment Paper — Always line your baking sheets. It prevents sticking and makes cleanup instant. I never bake these directly on the pan; the sugar melts and creates a mess that’s hard to scrub.
Cooling Rack — Essential for stopping the cooking process. Letting cookies cool on the hot pan continues to cook them, leading to dry cookies.
How to Make It
Let’s walk through the process. It’s simpler than it sounds, and the result is worth every minute.
Step 1: Brown the Butter (10 minutes)
Place your unsalted butter in a medium saucepan over medium heat. Stir constantly with a heatproof spatula. At first, it will just melt. Then, it will foam up. This is the water evaporating. Once the foam subsides, you’ll hear a sizzling sound. This is the milk solids toasting. Watch it like a hawk. It goes from golden yellow to a rich amber color with a nutty aroma. This takes about 5-7 minutes. As soon as it smells like toasted nuts and looks like amber, remove it from the heat. Pour it into a heatproof bowl to stop the cooking. Let it cool for 10 minutes until it’s just warm, not hot.
Step 2: Mix the Wet Ingredients (5 minutes)
In your large mixing bowl, combine the cooled brown butter, brown sugar, and granulated sugar. Whisk vigorously for about 2 minutes. You want to dissolve the sugar into the butter. This step is crucial for chewiness. Add the eggs one at a time, whisking well after each addition. Add the vanilla extract and salt. Whisk until the mixture is smooth and glossy. It should look like a thick, shiny paste.
Step 3: Combine Dry Ingredients (3 minutes)
In a separate medium bowl, whisk together the flour, baking soda, and any optional oats. Sifting isn’t strictly necessary if your flour isn’t clumpy, but it helps aerate it. If you’re adding oats, mix them in now.
Step 4: Make the Dough (3 minutes)
Gradually add the dry ingredients to the wet ingredients. Use a spatula or wooden spoon to fold them together. Stop as soon as no dry streaks remain. Do not overmix. Overmixing develops gluten, which makes cookies tough. You want tender, chewy cookies, not bread. Fold in the chocolate chips last. Reserve a few chips for topping if you want pretty cookies.
Step 5: Chill the Dough (30 minutes – 24 hours)
This is the step most people skip, but I recommend it. Chilling the dough hydrates the flour and firms up the fat, leading to thicker, chewier cookies with more concentrated flavor. Cover the bowl with plastic wrap and refrigerate for at least 30 minutes. If you have time, 24 hours is even better. The flavors meld and deepen.
Step 6: Scoop and Bake (15 minutes)
Preheat your oven to 350°F (175°C). Line your baking sheets with parchment paper. Scoop the dough into balls, about 2 tablespoons each. I use a small cookie scoop for consistency. Place them on the baking sheet, spaced 2 inches apart. They will spread. Bake for 10-12 minutes. The edges should be golden brown, but the centers should still look slightly soft and underdone. This is key for chewiness.
Step 7: Cool and Serve (10 minutes)
Remove the cookies from the oven. Sprinkle with flaky sea salt if using. Let them cool on the baking sheet for 5 minutes. This allows them to set. Then, transfer to a wire rack to cool completely. Eat one warm. It’s the best part.
Total time: About 45 minutes active, plus chilling time. But most of that is passive.
Expert Tips
Here’s everything I learned from making this recipe too many times. These tips separate the good cookies from the great ones.
Don’t Overbake
This is the #1 mistake. People see soft centers and panic. Trust me. The cookies continue to cook on the hot pan after you take them out of the oven. If you bake them until they look firm in the oven, they will be dry and crumbly when cool. Pull them when they look just barely done. The edges should be set and golden, but the center should still look soft.
Measure Flour Correctly
Flour is the enemy of chewiness if you use too much. I don’t pack my flour. I spoon it into the measuring cup and level it off with a knife. If you scoop directly from the bag, you’ll pack it down and add extra flour, leading to dry, cakey cookies. If you don’t have a scale, this is the most important technique to master.
Chill for Flavor
I know you want cookies now. But chilling the dough for 24 hours transforms the flavor. The butter fat solidifies, and the sugars have time to hydrate the flour. The result is a deeper, more complex taste and a thicker cookie. If you’re short on time, 30 minutes is the minimum. Don’t skip it entirely.
Use Room Temperature Eggs
Cold eggs can cause the brown butter to solidify into chunks, making it hard to mix evenly. Bring your eggs to room temperature by leaving them out for 30 minutes or soaking them in warm water for 5 minutes. This ensures a smooth, emulsified dough.
Reserve Chocolate Chips
When you scoop the dough, press a few extra chocolate chips on top of each ball before baking. They melt slightly and create that professional bakery look. It’s a small touch that makes the cookies feel special.
Recipe Variations
Once you’ve nailed the basic version, here’s how to mix it up. The brown butter base is incredibly versatile.
White Chocolate Macadamia
Swap the semi-sweet chips for white chocolate chips and add 1 cup of chopped macadamia nuts. The nuttiness of the brown butter pairs perfectly with the sweet white chocolate. It’s like a tropical vacation in a cookie.
Double Dark Chocolate
Use 1 cup of semi-sweet chips and 1 cup of dark chocolate chunks (70% cacao). Add 2 tablespoons of cocoa powder to the dry ingredients. This makes a fudgy, intense chocolate cookie. Great for coffee pairing.
Oatmeal Raisin Boost
Add 1 cup of old-fashioned rolled oats and ½ cup of raisins to the dough. The oats add fiber and chew, making this a more substantial snack. It’s like having oatmeal cookies with the luxury of brown butter.
Gluten-Free Option
Substitute the all-purpose flour with a 1:1 gluten-free flour blend that contains xanthan gum. I’ve tested this with Bob’s Red Mill and King Arthur, and both work well. The texture is slightly more tender, but still chewy.
Vegan Adaptation
Use vegan butter (like Miyoko’s) and flax eggs (2 tbsp ground flaxseed mixed with 6 tbsp water, rested for 10 minutes). Use dairy-free chocolate chips. The flavor is slightly different, but still delicious. The brown butter step works with vegan butter too.
Serving & Storage
These Easy Chewy Brown Butter Chocolate Chip Cookies are best enjoyed fresh, but they’re flexible.
Serving Suggestions
Enjoy them warm with a cold glass of milk. They’re also fantastic with coffee or tea. For a dessert platter, pair them with fresh berries and whipped cream. The contrast of textures and temperatures is amazing. They also travel well for potlucks or office snacks. Just pack them in an airtight container with parchment between layers.
Storage
Room Temperature: Store in an airtight container for up to 5 days. Add a slice of bread to the container to keep them soft. The bread absorbs moisture from the air and transfers it to the cookies.
Refrigerator: Not recommended. The cold dries out cookies. If you must refrigerate, wrap them tightly in plastic wrap.
Freezer: These freeze beautifully. You can freeze the baked cookies for up to 3 months. Thaw at room temperature. Or, freeze the dough balls on a baking sheet, then transfer to a freezer bag. Bake straight from frozen, adding 1-2 minutes to the bake time. This is my favorite meal prep hack.
Reheating
If you have leftovers, microwave a cookie for 10-15 seconds to warm it up. It feels like a fresh-baked cookie again. The center becomes gooey and soft.
Nutrition Information
I’m not a nutritionist, but here’s the breakdown. These are treats, but they’re made with whole ingredients.
Per cookie (makes approx. 24 cookies):
| Nutrient | Amount |
|---|---|
| Calories | 220 |
| Protein | 3g |
| Carbs | 28g |
| Fiber | 1g |
| Fat | 12g |
| Sugar | 18g |
| Sodium | 150mg |
My Take: This is comfort food with butter and chocolate. Not diet food. But it’s better than takeout and I know what’s in it. The fat and sugar provide quick energy, and the protein from the butter and eggs helps sustain it. If you’re watching your sugar, enjoy one or two. If you’re using oat flour, you’ll get more fiber. It’s about balance. These fuel your day without feeling like a diet compromise.
Final Thoughts
These Easy Chewy Brown Butter Chocolate Chip Cookies are more than just a recipe. They’re a moment of peace in a busy day. They’re a way to nourish yourself with something delicious and satisfying. I hope they become a staple in your kitchen, just as they have in mine. Don’t be afraid to experiment with the variations. Make them your own. If you make this, drop a comment! I love hearing how it turns out in your kitchen. Happy cooking!
FAQs
Can I use salted butter instead of unsalted?
You can, but you’ll need to reduce the added salt in the recipe. Salted butter varies in salt content, so start by reducing the salt to ½ teaspoon. Taste the dough if you can (it’s safe with cooked butter and eggs, but if you’re worried, just adjust). Unsalted butter gives you more control over the final flavor.
Why did my cookies spread too much?
This usually happens if the butter was too hot when you mixed it with the sugar, or if the dough wasn’t chilled enough. The butter melts and spreads before the structure sets. Make sure your brown butter is cooled to just warm, not hot, and chill the dough for at least 30 minutes.
Can I freeze the dough?
Yes! Scoop the dough into balls and freeze them on a baking sheet. Once solid, transfer to a freezer bag. They’ll last for 3 months. Bake from frozen, adding 1-2 minutes to the baking time. This is perfect for having fresh cookies on demand.
How do I make them extra chewy?
Use more brown sugar than white sugar. Chill the dough for 24 hours. And most importantly, underbake them slightly. Pull them when the edges are golden but the center looks soft. They will firm up as they cool.
Can I substitute the chocolate chips?
Absolutely. Use white chocolate, dark chocolate, butterscotch chips, or even chopped nuts. The brown butter base pairs well with almost any add-in. Just keep the volume similar to the original recipe.
Do I need to sift the flour?
Not strictly necessary, but it helps remove lumps and aerates the flour for a lighter texture. If your flour is fresh and clump-free, you can just whisk it with the baking soda.
How many cookies does this make?
This recipe makes approximately 24 medium-sized cookies, depending on how big you scoop them. I use a 2-tablespoon scoop, which yields about 24 cookies. If you make them larger, you’ll get fewer, but they’ll be more substantial snacks.
Pin This Recipe!

Easy Chewy Brown Butter Chocolate Chip Cookies
- Total Time: 45 minutes
- Yield: 24 cookies 1x
Description
Rich, chewy cookies with crispy edges and deep nutty flavor from browned butter. These cookies provide sustained energy without the afternoon crash, making them perfect for fueling your day.
Ingredients
- 1 cup (226g) unsalted butter
- 2 ¼ cups (280g) all-purpose flour
- 1 cup (200g) packed brown sugar
- ½ cup (100g) granulated sugar
- 2 large eggs, room temperature
- 2 tsp vanilla extract
- 2 cups (340g) semi-sweet chocolate chips
- 1 tsp baking soda
- 1 tsp fine sea salt
- ½ cup (40g) rolled oats (optional)
Instructions
- Brown the butter: Melt unsalted butter in a medium saucepan over medium heat. Stir constantly until it foams, then subsides, turning amber and smelling nutty (5-7 minutes). Remove from heat and pour into a heatproof bowl to cool for 10 minutes.
- Mix wet ingredients: In a large bowl, whisk the cooled brown butter, brown sugar, and granulated sugar vigorously for 2 minutes. Add eggs one at a time, whisking well after each. Add vanilla extract and salt; whisk until smooth and glossy.
- Combine dry ingredients: In a separate medium bowl, whisk together flour, baking soda, and optional oats.
- Make the dough: Gradually fold dry ingredients into wet ingredients using a spatula until no dry streaks remain. Do not overmix. Fold in chocolate chips, reserving a few for topping if desired.
- Chill the dough: Cover and refrigerate dough for at least 30 minutes (or up to 24 hours for deeper flavor).
- Scoop and bake: Preheat oven to 350°F (175°C). Line baking sheets with parchment paper. Scoop dough into 2-tablespoon balls, spacing them 2 inches apart. Bake for 10-12 minutes until edges are golden but centers look slightly soft.
- Cool and serve: Sprinkle with flaky sea salt if using. Let cookies cool on the baking sheet for 5 minutes, then transfer to a wire rack to cool completely.
Notes
Do not overbake; cookies continue to cook on the hot pan. Measure flour by spooning it into the cup and leveling off, rather than scooping directly from the bag. Chilling the dough for 24 hours enhances flavor and texture. Dough balls can be frozen for up to 3 months.
- Prep Time: 15 minutes
- Cook Time: 10 minutes
- Category: Dessert
- Cuisine: American
Nutrition
- Serving Size: 1 cookie
- Calories: 220
- Sugar: 18
- Sodium: 150
- Fat: 12
- Saturated Fat: 7
- Carbohydrates: 28
- Fiber: 1
- Protein: 3
Keywords: brown butter cookies, chocolate chip cookies, chewy cookies, baking, afternoon snack, meal prep cookies


