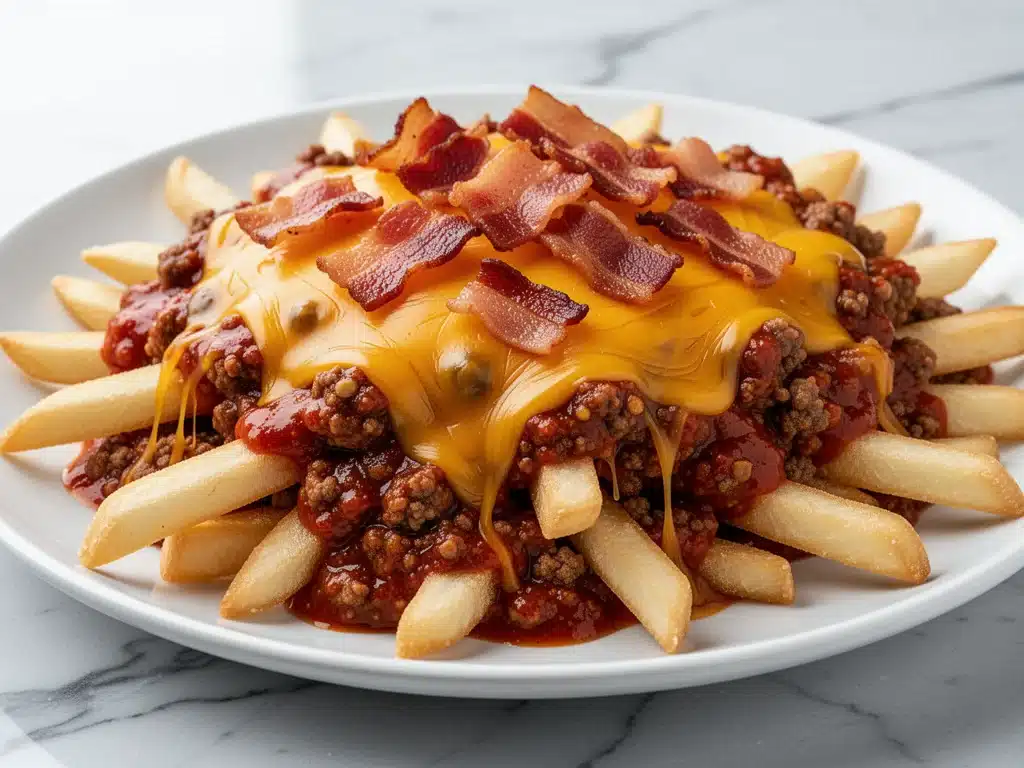
Let me tell you about the Sunday of Super Bowl Sunday three years ago. I had promised my brother-in-law, Dave, that I would make “the best game day food ever.” Dave is the kind of guy who eats with his mouth open and judges you silently if the snack bowl is empty. I had planned a spread of artisanal cheeses, complicated deviled eggs, and those fancy crostini things that take forever to make. What happened? Dave ignored the crostini. He ignored the cheese board. He went straight for the bowl of chili cheese fries I threw together on a whim because I was running out of time.
He ate six servings. Six. And then he asked for the recipe. That’s when I realized something important: sometimes the most beloved dishes aren’t the most complicated ones. They’re the ones that hit every single sensory button at once. Salty, savory, spicy, creamy, and crunchy. That bowl of chili cheese fries became a legend in my family. Now, every time we gather for a big game, the first question isn’t “Who’s winning?” It’s “Are we having the chili cheese fries?”
This isn’t your average sad, soggy fries from a fast-food place. This is the real deal. I’m talking about thick-cut fries that stay crispy under the heat, smothered in a rich, slow-simmered chili that’s packed with flavor, and topped with a cheese sauce that actually stretches. And the secret weapon? Crispy bacon bits. Not the soft, chewy strips you bake in the oven, but the little crunchy shards that add texture and that smoky punch. I’ve tested this recipe dozens of times to get the balance right—enough chili to coat, but not enough to drown the fries. It’s the kind of dish that disappears in minutes and leaves everyone asking for more. If you’re looking for a crowd-pleaser that’s actually easy to make, this is it.
Why You’ll Love This Game Day Chili Cheese Fries Recipe
There are about ten reasons I keep making these chili cheese fries, but let’s be honest—you’re probably here because you want food that’s impressive but doesn’t require a degree in culinary arts. Here’s why this recipe has earned a permanent spot in my rotation, and why it will likely earn one in yours too.
- Zero Fuss, Maximum Flavor — Seriously, if you can boil water and fry bacon, you can make this. I’ve made this recipe while watching the game, and it hasn’t burned once. The chili can be made ahead, so you’re not stressed when kickoff starts.
- Crunch Factor — Most chili cheese fries fail because the fries get soggy. I’ve cracked the code on keeping them crispy. The key is in how you layer it. You’ll get that satisfying crunch with every bite, followed by the warm, gooey cheese. It’s a texture dream.
- Customizable for Everyone — Maybe your partner is a spice fiend and your kids are mild-sauce purists. This recipe handles it. Make one big pot of chili, split it into two bowls, and add more cayenne to one. Serve the cheese sauce on the side, or drizzle it generously. You control the heat level.
- Perfect for Crowds — I’ve served this to groups of 15 people at tailgates and groups of 4 at home game nights. It scales up easily. You just need a bigger skillet and maybe two pots of chili. It’s the ultimate finger food that feels like a meal.
- Leftover Gold — Okay, real talk: there are rarely leftovers. But if there are, they taste even better the next day as a breakfast-for-dinner situation. Just reheat gently so the cheese doesn’t separate. I know, it’s sad when they’re gone, but that’s a good problem to have.
This is my go-to when I need dinner to just work. No complicated techniques, no weird ingredients you have to drive to three different stores for, just reliable, delicious food that makes everyone happy. Whether it’s the Super Bowl, the World Cup, or just a Tuesday night, these fries are the answer.
Ingredients You’ll Need for Game Day Chili Cheese Fries
Here’s the best part: you probably have most of this already in your pantry and fridge. I’m particular about three ingredients here—the chili base, the cheese choice, and the bacon—and I’ll tell you exactly why they matter. Don’t skip the details; they make the difference between “okay” and “addictive.”
For the Chili Base
Ground beef (1 pound / 450g) — I use 80/20 fat ratio. Lean beef makes the chili dry and crumbly. You want that juiciness. If you prefer turkey, you can use it, but add a tablespoon of olive oil to compensate for the lack of fat. Beef just tastes more traditional here.
Yellow onion (1 medium, finely diced / about 200g) — Sweet onions work too, but yellow gives better depth. White onions are too sharp and pungent for this. Dice it small so it melts into the sauce.
Garlic (4 cloves, minced / about 2 tablespoons) — Yes, four cloves. Don’t skimp. Fresh only—no jarred garlic in this recipe. Jarred garlic has a metallic taste that clashes with the rich chili. Mince it yourself; it’s worth the 30 seconds.
Tomato paste (2 tablespoons) — This is the secret to a thick, rich chili. It adds umami and body. Don’t skip it. It concentrates the tomato flavor without adding too much liquid.
Tomato sauce (1 can, 15 oz / 425g) — Use crushed tomatoes or tomato sauce, not diced. You want a smooth base that coats the fries evenly. Diced tomatoes make the chili chunky in a way that doesn’t work well for topping fries.
Chili powder (2 tablespoons) — I use a good quality blend like McCormick or a local brand. It’s not just chili powder; it’s a mix of cumin, oregano, and garlic powder. If you only have pure chili powder, add 1 teaspoon of cumin and ½ teaspoon of oregano.
Ground cumin (1 teaspoon) — Adds that earthy, warm backbone flavor. Essential for authentic chili taste.
Smoked paprika (1 teaspoon) — This gives the smoky depth that mimics slow-cooking. It’s the flavor profile that makes you think of a campfire. I don’t use regular paprika; the smoked version is key.
Beef broth (1 cup / 240ml) — I use low-sodium so I can control the salt. Chicken broth works too, but beef adds more richness. Vegetable broth is fine for a lighter version.
Dark chocolate (1 square, about 1 oz / 30g) — Sounds weird, right? Trust me. A small square of semi-sweet chocolate adds depth and richness to the chili. It doesn’t make it taste like dessert. It’s a trick I learned from a chef friend, and it works magic.
For the Cheese Sauce
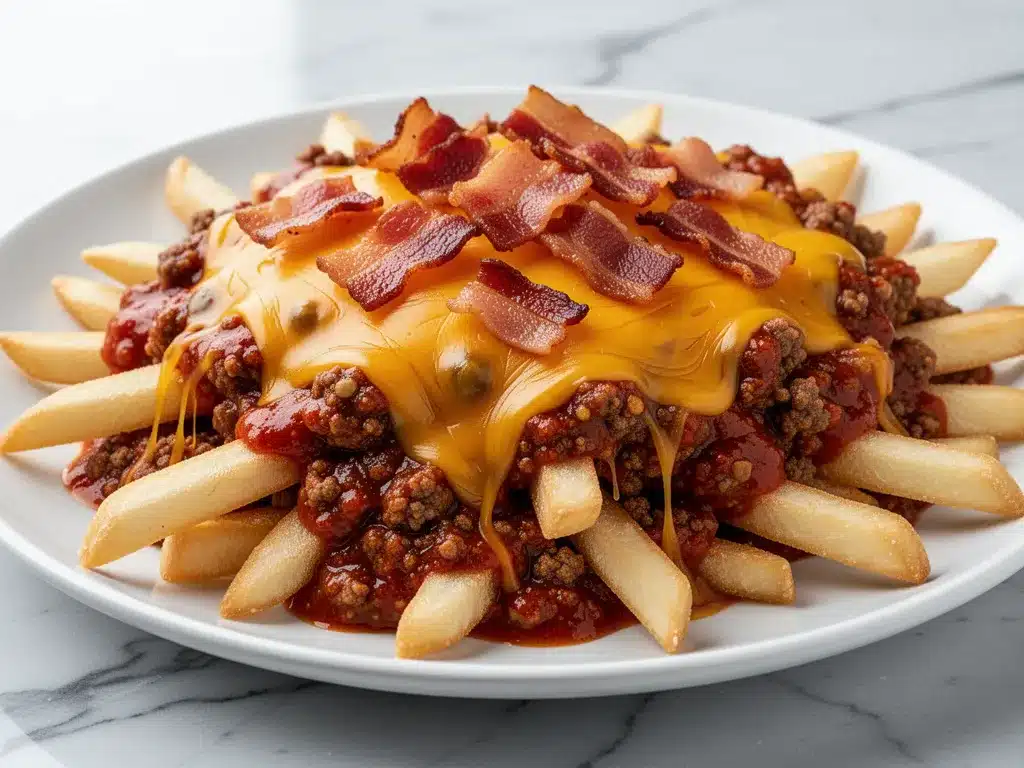
Sharp cheddar cheese (2 cups / 200g, freshly grated) — Buy the block and grate it yourself. Pre-grated cheese has anti-caking agents that make the sauce grainy and clumpy. Sharp cheddar has more flavor than mild. If you can’t find sharp, mix mild and extra-sharp.
Butter (2 tablespoons) — Unsalted is best so you can control the salt. It helps create the roux that thickens the cheese sauce.
All-purpose flour (2 tablespoons) — This creates the roux with the butter. It prevents the cheese sauce from being too runny.
Milk (1 cup / 240ml) — Whole milk works best for richness. Skim milk makes it watery. If you want a lighter version, half-and-half is a good middle ground.
For the Toppings
French fries or thick-cut potato fries (2 pounds / 900g) — I recommend oven-baked or air-fried fries for a healthier twist, but deep-fried are traditional. If you buy frozen fries, choose “steak fries” or “thick-cut” for better structure. Thin shoestring fries get soggy too fast.
Bacon (6 slices) — Thick-cut bacon is best for crisping. Thin bacon burns too easily. You want it to be almost like bacon chips.
Green onions (2 stalks, sliced) — For fresh color and a mild onion bite. Chives work too, but green onions look better.
Optional Add-ins — Jalapeños (sliced or diced) for heat. Black olives (sliced) for briny contrast. Sour cream (dollop) for cooling richness.
Equipment Needed for Game Day Chili Cheese Fries
You don’t need fancy equipment for this. Here’s what I actually use. You probably have most of this in your kitchen already.
Large skillet or Dutch oven — I use a 12-inch cast iron skillet for the chili. It holds heat well and prevents burning. A Dutch oven is great if you’re making a huge batch. Needs to be big enough to fit the chili and allow for stirring.
Medium saucepan — For the cheese sauce. A 2-quart saucepan works perfectly. Don’t use a tiny pan; you need room to whisk without splashing.
Sharp knife — For chopping onions, bacon, and green onions. Dull knives make you cry more—learned this the hard way with onions.
Cutting board — Any size works. I use plastic for easier cleanup, especially with raw meat.
Wooden spoon — For stirring the chili. Silicone works too. Don’t use metal on cast iron if you’re seasoning it.
Whisk — Essential for the cheese sauce. You need to whisk constantly to prevent lumps. A small balloon whisk is best.
Baking sheet — For baking the bacon. Line it with parchment paper for easy cleanup. I use a wire rack on top of the sheet for extra crispiness, but it’s not necessary.
Serving platter or large bowl — You need a big vessel to hold all the fries and toppings. A large wooden board looks rustic and great for sharing.
Optional but nice: Cheese grater — Box grater or microplane. Or food processor if you’re grating lots of cheese. Pastry brush — For brushing fries with oil if baking.
How to Make It: Step-by-Step
Alright, let’s make this! I’m walking you through exactly how I do it, including the little tricks I’ve picked up. This recipe is designed to be made in stages so you can prep ahead, but the final assembly is quick.
Step 1: Cook the Bacon (10-12 minutes)
Preheat your oven to 400°F (200°C). Line a baking sheet with parchment paper. Place the bacon slices in a single layer on the sheet. Bake for 10-12 minutes, flipping halfway through, until crispy. If you like it extra crunchy, leave it in for another 2 minutes. Remove from the oven and let it cool on the sheet for 2 minutes, then chop it into small bits. Reserve a tablespoon of the bacon grease for frying the onions if you want extra flavor (optional), or just discard it.
Step 2: Make the Chili (20-25 minutes)
While the bacon is baking, heat a large skillet or Dutch oven over medium-high heat. Add the ground beef and break it up with a wooden spoon. Cook until browned, about 5-7 minutes. Drain excess fat if there’s too much, but leave a little for flavor. Add the diced onion and cook for 3-4 minutes until softened. Add the minced garlic and cook for 1 minute until fragrant. Stir in the tomato paste, chili powder, cumin, and smoked paprika. Cook for 1 minute to toast the spices. Pour in the tomato sauce and beef broth. Stir well, scraping up any browned bits from the bottom. Bring to a simmer, then reduce heat to low. Cover and let it simmer for 15 minutes. Stir in the square of dark chocolate at the end. Taste and adjust salt and pepper. The chili should be thick and rich, not watery.
Step 3: Prepare the Cheese Sauce (10 minutes)
In a medium saucepan, melt the butter over medium heat. Whisk in the flour and cook for 1 minute, stirring constantly, until it forms a paste (roux). Gradually whisk in the milk, a little at a time, to avoid lumps. Continue whisking until the mixture thickens, about 3-4 minutes. Reduce heat to low. Gradually add the grated cheddar cheese, a handful at a time, stirring constantly until melted and smooth. Do not let the sauce boil once the cheese is added, or it will separate. Keep warm on low heat.
Step 4: Cook the Fries (20-30 minutes)
If using fresh potatoes, peel and cut into thick strips. Soak in cold water for 30 minutes to remove starch, then pat completely dry. Toss with oil, salt, and pepper. Bake at 425°F (220°C) on a wire rack-lined baking sheet for 25-30 minutes, flipping halfway, until golden and crispy. If using frozen fries, follow package instructions for baking or air-frying. You want them crispy, not soggy.
Step 5: Assemble the Chili Cheese Fries (5 minutes)
Spread the hot fries on a large serving platter or in a large bowl. Ladle the hot chili over the fries, ensuring they are well-coated. Drizzle the warm cheese sauce generously over the chili and fries. Sprinkle the crispy bacon bits over the top. Garnish with sliced green onions. Serve immediately while everything is hot and crispy.
Total Time: About 45 minutes (mostly hands-off simmering and baking)
Expert Tips & Tricks for Perfect Chili Cheese Fries
Here’s everything I’ve learned from making this dozens of times. These tips will save you from my mistakes.
The Fry Foundation
Don’t Skip the Soak — If you’re making fresh fries, soaking them in cold water removes surface starch. This is the #1 reason fries get soggy. Pat them dry thoroughly before baking. Moisture is the enemy of crispiness.
Double Fry Method — For extra crispiness, fry or bake the fries once at a lower temperature to cook through, then again at a higher temperature to crisp up. It takes extra time but is worth it for game day.
Chili Secrets
Simmer Longer — If you have time, let the chili simmer for 30-45 minutes. The flavors meld and deepen. But for a quick weeknight version, 15 minutes works fine.
Chocolate is Key — I know it sounds strange, but the chocolate adds a subtle richness and depth that balances the acidity of the tomatoes. It doesn’t make it sweet. Trust me.
Cheese Sauce Stability
Low and Slow — Never boil the cheese sauce. High heat makes the proteins seize up, resulting in a grainy, separated sauce. Keep it on low heat and stir constantly.
Grate Your Own Cheese — Pre-grated cheese contains cellulose to prevent clumping, which stops it from melting smoothly. Block cheese melts into a silky sauce. It takes 3 minutes and makes a huge difference.
Assembly Strategy
Serve Immediately — Chili cheese fries are best eaten within 5 minutes of assembly. If you let them sit, the fries will absorb the moisture and become soggy. If you need to hold them, keep the fries separate and assemble just before serving.
Variations & Substitutions for Game Day Chili Cheese Fries
Once you’ve nailed the basic version, here’s how you can mix it up. I’ve tried all of these.
Protein Swaps
Turkey Chili — Use ground turkey instead of beef. Add a tablespoon of olive oil when cooking to prevent drying. It’s lighter but still tasty.
Vegetarian Chili — Skip the meat and add a can of black beans and kidney beans. Use vegetable broth. The texture is hearty and satisfying.
Chicken Chili — Use shredded rotisserie chicken. Add it at the end of simmering to warm through. It’s milder and faster.
Cheese Variations
Pepper Jack — Mix half cheddar with half pepper jack for a spicy kick. Great if you like heat.
Mexican Blend — Use a pre-shredded Mexican blend cheese for convenience. It usually has pepper jack and Monterey Jack in it.
Vegan Cheese — Use vegan cheddar shreds. They melt differently, so add them off heat and stir gently. Not as gooey, but still good.
Fry Alternatives
Sweet Potato Fries — Use sweet potato fries for a sweeter contrast. They pair well with the spicy chili.
Potato Wedges — Cut potatoes into wedges instead of strips. They’re chunkier and hold up well to heavy toppings.
Topping Twists
Jalapeño Popper — Add diced jalapeños and cream cheese to the topping bar. Very popular with spice lovers.
BBQ Bacon — Drizzle barbecue sauce over the fries before adding the chili. Smoky and sweet.
Guacamole — Add a dollop of guacamole for freshness and creaminess. Balances the heavy chili and cheese.
Serving & Storage for Game Day Chili Cheese Fries
I usually serve this straight from the kitchen to the living room on a large platter—it looks rustic and stays warm. But here are other ways I’ve enjoyed it:
How to Serve
Side Dishes — These are so filling, you don’t need much else. But a simple green salad with vinaigrette cuts through the richness. Or cornbread on the side for dipping.
Toppings Bar — When I have guests, I put out: extra chili, extra cheese sauce, sour cream, sliced jalapeños, black olives, and more bacon bits. Everyone customizes their portion.
Wine Pairing — Not a wine expert, but my friend says a bold red like Cabernet Sauvignon or a spicy Zinfandel works great with the chili. For beer, an IPA or a lager is classic.
Storage Instructions
Refrigerator — Store the chili and cheese sauce separately in airtight containers for up to 3 days. The fries are best fresh, but you can store them and re-crisp them in the oven. Do not store assembled fries; they will get soggy.
Reheating — Reheat chili in a saucepan over low heat, stirring occasionally. Reheat cheese sauce in a microwave in 30-second intervals, stirring between, adding a splash of milk if it thickens too much. Re-crisp fries in the oven at 400°F for 5-10 minutes. Assemble just before serving.
Freezing — Chili freezes well for up to 3 months. Cheese sauce does not freeze well; it separates and becomes grainy. Make fresh when needed.
Pro tip: If you’re meal-prepping, make the chili on Sunday and freeze it in portions. Reheat on game day and just cook the fries and cheese sauce. Saves so much stress.
Nutrition Information
I’m not a nutritionist, but here’s the breakdown if you’re tracking. This is comfort food, so expect it to be hearty!
Per Serving (based on 6 servings, assuming 1/6 of chili, 1/6 cheese sauce, and 1/6 fries):
- Calories: 650
- Protein: 25g
- Carbs: 45g
- Fiber: 4g
- Sugar: 5g
- Fat: 38g
- Saturated Fat: 18g
- Cholesterol: 75mg
- Sodium: 850mg
- Calcium: 300mg
What’s Good: High protein from beef and cheese. Good calcium from the cheese. Can add vegetables to boost nutrition.
What to Know: Higher in calories and fat from cheese and beef. Contains dairy and gluten. Moderate sodium (use low-sodium broth and cheese to reduce).
My Take: Look, this is indulgent game day food. It’s not a diet recipe. But it’s better than takeout, costs less, and I know exactly what’s in it. When I want to make it lighter, I use lean turkey, low-fat cheese, and baked sweet potato fries. But usually? I just enjoy a reasonable portion and savor it.
Final Thoughts
So that’s my game day chili cheese fries with crispy bacon bits! I’ve probably talked your ear off at this point, but when you make a recipe this often, you have a lot to say about it.
This has saved game days more times than I can count. It’s my answer to “what’s for snacks” when I’m tired, don’t want to order out, and still want something that tastes really good. My family is happy, my guests are happy, and I’m happy because I’m not stressed about cooking.
Make it yours! Try different add-ins, swap in your favorite vegetables, adjust the garlic (though more is always better in my opinion). The best recipes are the ones you adapt to your family’s tastes.
If you make this, drop a comment and let me know what you think! I love hearing how recipes turn out in your kitchen. And if something doesn’t work, tell me that too—I’m here to help troubleshoot.
Happy cooking! And I hope your kitchen smells half as good as mine does right now.
Frequently Asked Questions
Can I make the chili ahead of time?
Absolutely. In fact, it tastes better the next day. Make the chili up to 3 days ahead and store in the fridge. Reheat gently on the stove. This saves so much time on game day. You can also freeze it for up to 3 months.
Why did my cheese sauce separate?
This usually happens if the heat was too high when you added the cheese, or if you used pre-grated cheese. Always remove the pan from heat before adding cheese, and stir in a splash of warm milk if it looks grainy. Grate your own cheese from a block to avoid anti-caking agents.
Can I use frozen fries?
Yes! Frozen fries work great. Just follow the package instructions for baking or air-frying. Make sure they are crispy before adding toppings. I recommend “steak fries” or “thick-cut” for better structure. Avoid thin shoestring fries as they get soggy too fast.
How do I keep the fries crispy?
The key is to assemble the fries right before serving. If you let them sit under the chili and cheese, they will absorb moisture and become soggy. If you need to hold them, keep the fries separate and warm in the oven, and assemble just before eating.
Can I make this vegetarian?
Yes! Skip the beef and add a can of black beans and kidney beans to the chili. Use vegetable broth instead of beef broth. The cheese sauce and bacon can be omitted or replaced with vegan bacon bits. It’s just as delicious.
What kind of cheese is best for the sauce?
Sharp cheddar is the classic choice because it has a strong flavor that stands up to the chili. You can also mix in Monterey Jack for meltability, or Pepper Jack for spice. Avoid pre-shredded cheese for the best results.
Can I freeze the cheese sauce?
No, I don’t recommend freezing cheese sauce. It tends to separate and become grainy when thawed. It’s best made fresh. The chili, however, freezes beautifully.
Pin This Recipe!
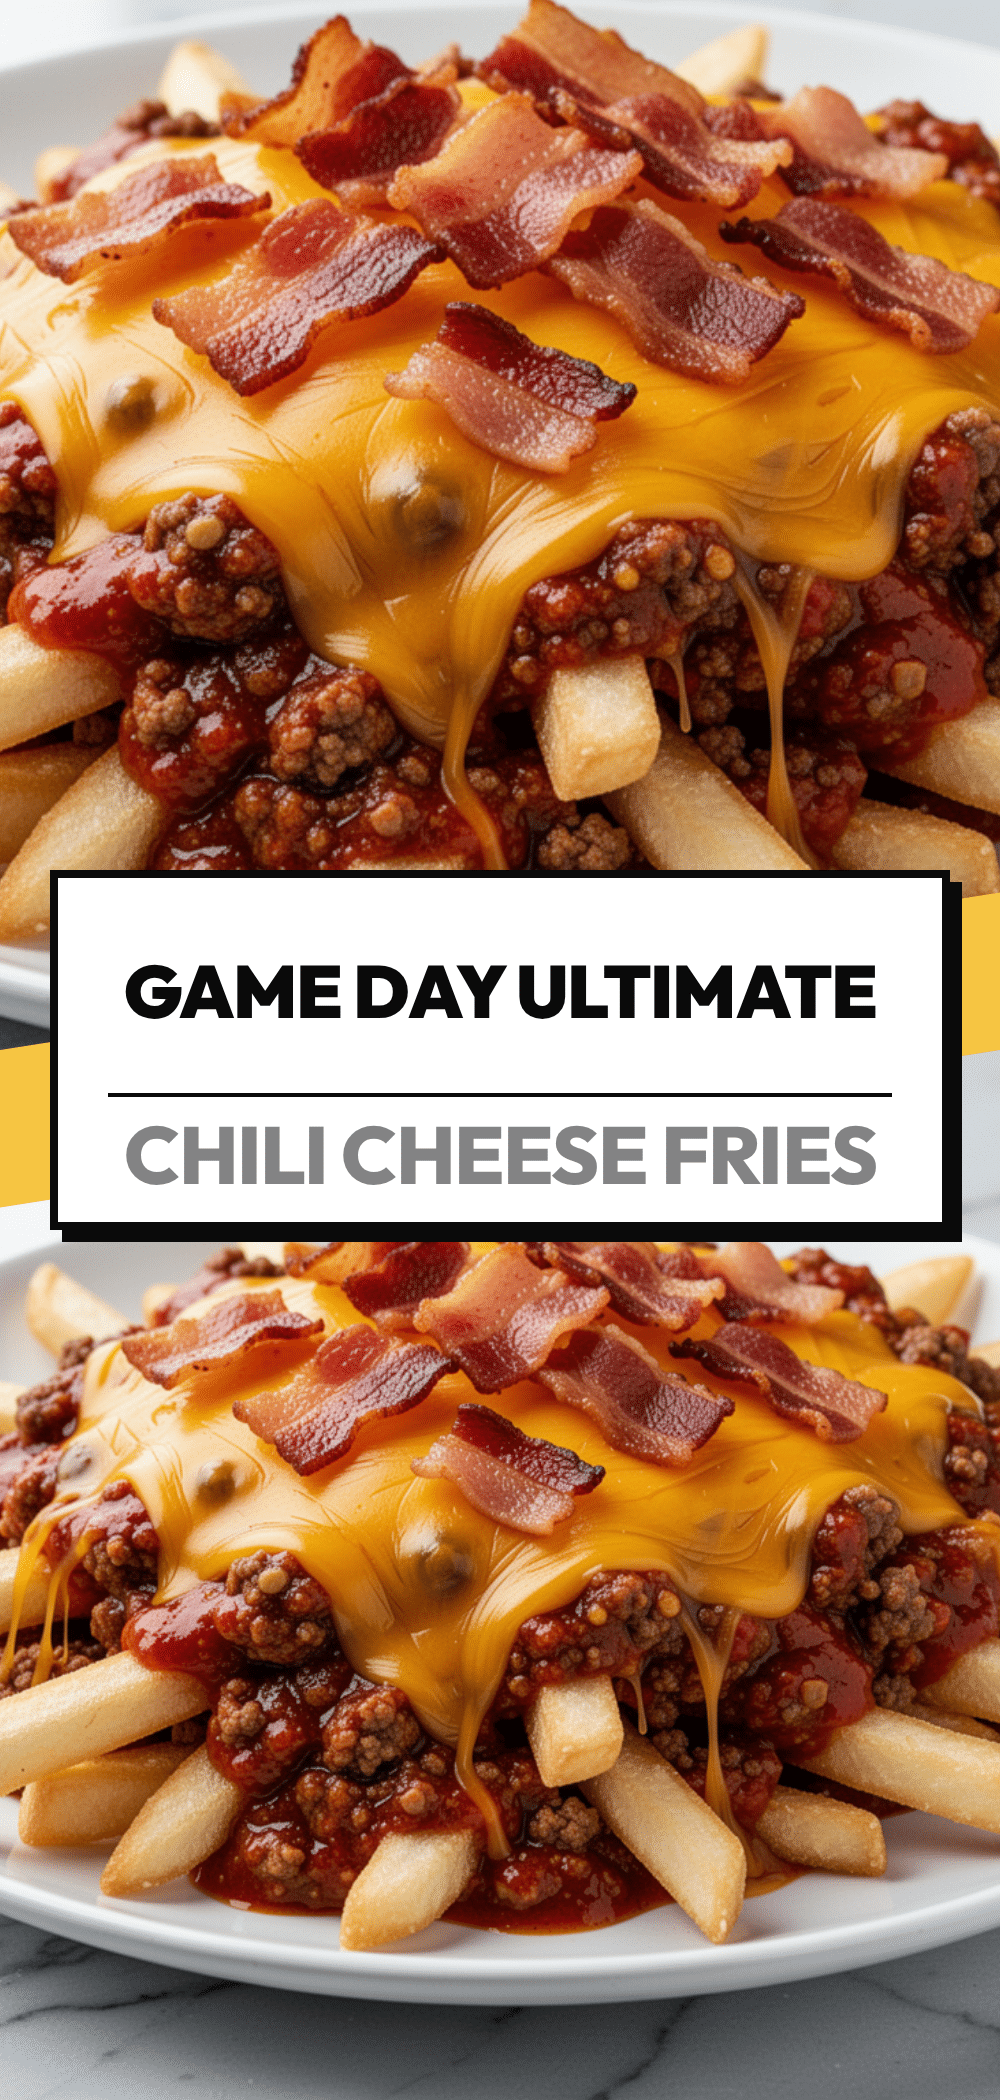
Game Day Chili Cheese Fries: Best 15-Min Easy Recipe
- Total Time: 45 minutes
- Yield: 6 servings 1x
Description
A crowd-pleasing game day dish featuring thick-cut crispy fries smothered in rich, slow-simmered beef chili and a smooth, homemade sharp cheddar cheese sauce, topped with crispy bacon bits.
Ingredients
- 1 pound ground beef (80/20 fat ratio)
- 1 medium yellow onion, finely diced
- 4 cloves garlic, minced
- 2 tablespoons tomato paste
- 1 can (15 oz) tomato sauce
- 2 tablespoons chili powder
- 1 teaspoon ground cumin
- 1 teaspoon smoked paprika
- 1 cup beef broth (low-sodium)
- 1 square (1 oz) dark chocolate (semi-sweet)
- 2 cups sharp cheddar cheese, freshly grated
- 2 tablespoons unsalted butter
- 2 tablespoons all-purpose flour
- 1 cup whole milk
- 2 pounds French fries or thick-cut potato fries
- 6 slices thick-cut bacon
- 2 stalks green onions, sliced
- Salt and pepper to taste
Instructions
- Preheat oven to 400°F (200°C). Line a baking sheet with parchment paper and bake bacon slices for 10-12 minutes until crispy. Chop into bits and set aside.
- In a large skillet or Dutch oven over medium-high heat, brown the ground beef, breaking it up with a spoon. Drain excess fat if necessary.
- Add diced onion and cook for 3-4 minutes until softened. Add minced garlic and cook for 1 minute until fragrant.
- Stir in tomato paste, chili powder, cumin, and smoked paprika. Cook for 1 minute to toast spices.
- Pour in tomato sauce and beef broth. Stir to combine, scraping up browned bits. Bring to a simmer, reduce heat to low, cover, and simmer for 15 minutes.
- Stir in the square of dark chocolate at the end of simmering. Adjust salt and pepper to taste.
- In a medium saucepan, melt butter over medium heat. Whisk in flour to form a roux and cook for 1 minute.
- Gradually whisk in milk, continuing to whisk until the mixture thickens (3-4 minutes).
- Reduce heat to low and gradually add grated cheddar cheese, stirring constantly until melted and smooth. Do not boil. Keep warm.
- Prepare fries according to package instructions (bake or air-fry) until golden and crispy. If making fresh, soak in cold water, dry thoroughly, and bake at 425°F for 25-30 minutes.
- Spread hot fries on a serving platter. Ladle chili over fries, drizzle with cheese sauce, and top with bacon bits and green onions. Serve immediately.
Notes
For best results, grate your own cheese to avoid anti-caking agents that cause graininess. Do not boil the cheese sauce once cheese is added to prevent separation. Assemble fries immediately before serving to maintain crispiness. Chili can be made ahead and frozen; cheese sauce should be made fresh.
- Prep Time: 15 minutes
- Cook Time: 30 minutes
- Category: Appetizer
- Cuisine: American
Nutrition
- Serving Size: 1/6 of the total bat
- Calories: 650
- Sugar: 5
- Sodium: 850
- Fat: 38
- Saturated Fat: 18
- Carbohydrates: 45
- Fiber: 4
- Protein: 25
Keywords: chili cheese fries, game day food, super bowl snacks, easy chili recipe, homemade cheese sauce, bacon fries, comfort food


