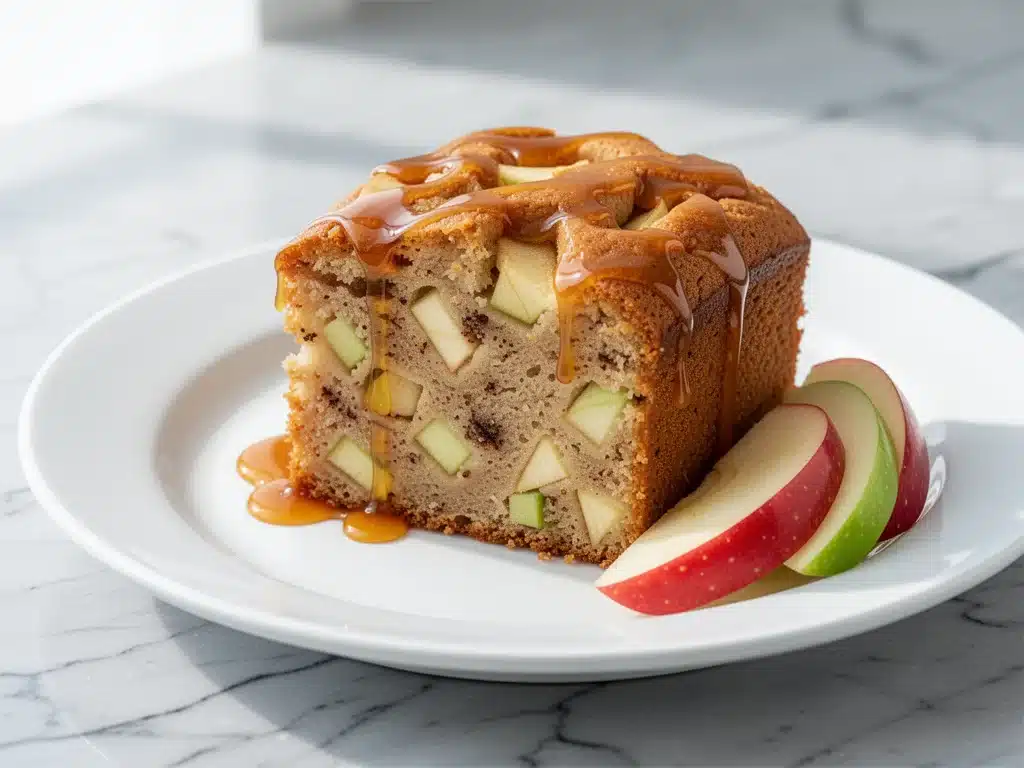
Last Saturday, I was standing in my kitchen, staring at a pan of cake that had just come out of the oven. It was golden, steaming, and smelled like autumn had decided to throw a party in my house. I cut a slice, drizzled a little extra caramel glaze over the top (because why stop at one?), and took a bite. It was so moist I actually had to pause and think about how I’d pulled it off.
That’s when I heard the knock.
It was Mrs. Gable from next door. She didn’t even say hello. She just pointed at the pan and said, “I smelled that from my porch. Can I have some?”
This is the Ultra-Moist Apple Dapple Cake with Caramel Glaze we’re talking about. It’s the kind of recipe that doesn’t just feed people; it creates community. I’ve made this cake for potlucks, for last-minute guests, and even for my own selfish weekend breakfasts. Every single time, people ask for the recipe. They ask about the texture. They ask about the apples. And they always, always ask for the caramel drizzle.
I’ve tested this recipe about ten times over the last few months. I’ve tried different apples, different flour blends, and different ways to fold in the fruit. Some versions were dry. Some were too dense. One time I burned the bottom because I was distracted by a phone call (don’t judge me). But this version? This is the one. It’s tender, it’s incredibly moist, and it has those signature “dapples” of soft, cooked apple throughout every bite.
It’s not complicated. You don’t need fancy equipment or hard-to-find ingredients. You just need a little patience and a love for good food. If you’ve been looking for a dessert that feels like a hug in cake form, this is it. Let’s get baking.
Why You’ll Love This Apple Dapple Cake
There are a lot of apple cakes out there. Some are heavy. Some are dry. Some taste more like cinnamon candy than actual fruit. This Ultra-Moist Apple Dapple Cake with Caramel Glaze is different because it respects the apple. It lets the fruit shine while providing a rich, buttery backdrop that ties everything together.
Here’s why this recipe has earned a permanent spot in my rotation:
The Texture is Unbeatable — The secret isn’t just the apples; it’s the buttermilk and the oil. Most cake recipes use butter, which can sometimes lead to a denser crumb. Using a mix of oil and buttermilk keeps this cake incredibly tender and moist for days. I’ve had leftovers on my counter for three days, and they were still soft on day four. That’s rare for a fruit cake.
The “Dapple” Effect — This isn’t a loaf where the apples are just on top. We fold chopped apples into the batter, then press more on top. As it bakes, the apples sink slightly and create those beautiful, rustic dapples. It looks homemade and fancy at the same time. It’s the kind of presentation that makes you look like a pro baker without any real effort.
Caramel Glaze That Actually Sticks — Many cake recipes call for a glaze that runs off the side and pools on the plate. This caramel glaze is thick enough to coat the cake but thin enough to drizzle beautifully. It adds a salty-sweet crunch that contrasts with the soft cake. It’s the finishing touch that makes people stop chewing and start sighing.
It’s Forgiving — I’ve made this cake when I was tired, when I was rushed, and when I didn’t have precise measuring spoons. It still turned out amazing. The batter is loose, which can be intimidating if you’re used to stiff cake batters, but that looseness is exactly what creates the moist texture. Trust the process.
Perfect for Any Occasion — While this is technically a dessert, I’ve served it for brunch with coffee, for afternoon tea, and as a late-night snack. It pairs equally well with a cup of black coffee or a glass of cold milk. It’s versatile enough to fit into any meal or moment.
This cake has saved me more times than I can count. It’s my go-to when I need to bring something impressive to a gathering, or when I just need to cheer myself up on a rainy Tuesday. It’s reliable, delicious, and always a crowd-pleaser.
Ingredients You’ll Need
Before we start, let’s talk about what goes into this cake. I’m particular about a few things here, mostly because I’ve learned the hard way that shortcuts can hurt the final result. But don’t worry—most of this is stuff you probably already have in your pantry.
For the Cake Base
All-purpose flour (2 cups / 250g) — This is your structure. Don’t try to swap this for almond flour unless you want a completely different texture. If you’re gluten-free, you can use a 1-to-1 gluten-free flour blend, but the texture will be slightly different. I stick to regular AP flour for that classic tender crumb.
Baking powder (1 teaspoon) — And baking soda (½ teaspoon). You need both. The baking soda reacts with the buttermilk to help the cake rise and brown beautifully. Don’t skip either leavening agent.
Salt (1 teaspoon) — Essential for balancing the sweetness. It makes the apple flavor pop. Use kosher salt if you have it; if you use table salt, reduce to ¾ teaspoon.
Unsalted butter (½ cup / 115g, softened) — This gives the cake its rich flavor. Make sure it’s softened to room temperature. If you microwave it, it might melt in spots, which can affect the creaming process. Softened means it yields to gentle pressure but isn’t oily.
Granulated sugar (1 cup / 200g) — For sweetness and structure. I don’t recommend reducing this significantly, as sugar also helps retain moisture.
Brown sugar (½ cup / 100g, packed) — This adds a hint of molasses flavor and keeps the cake moist. Dark brown sugar is nicer, but light works fine too.
Eggs (2 large, room temperature) — Room temperature eggs emulsify better into the batter. If your eggs are cold, run them under warm water for a few minutes. Cold eggs can cause the batter to curdle when mixed with the butter.
Vanilla extract (2 teaspoons) — Use real vanilla, not imitation. It makes a huge difference in a cake this simple. The vanilla ties the apples and caramel together.
Buttermilk (1 cup / 240ml) — This is the moisture secret. The acidity tenderizes the gluten in the flour, resulting in a softer cake. If you don’t have buttermilk, make your own: add 1 tablespoon of lemon juice or white vinegar to a measuring cup, then fill the rest with regular milk. Let it sit for 5-10 minutes until it curdles slightly.
For the Apples
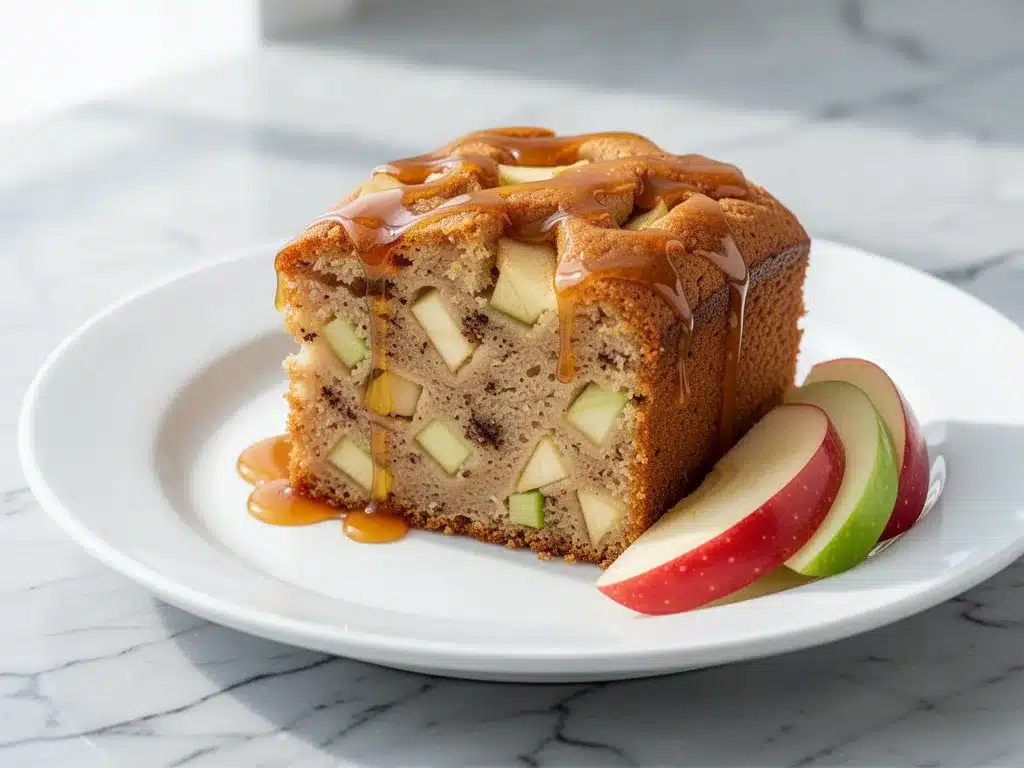
Granny Smith apples (3 medium, about 1.5 lbs / 680g) — I use Granny Smiths because they hold their shape well and provide a nice tart contrast to the sweet cake. If you prefer sweeter apples, you can use Honeycrisp or Fuji, but Granny Smith is my go-to for this specific recipe. Peel them and dice them into small, ½-inch cubes.
Optional: Cinnamon (1 teaspoon) — I usually add this to the apples before folding them in, but it’s up to you. It enhances the apple flavor without overwhelming it.
For the Caramel Glaze
Heavy cream (½ cup / 120ml) — Full fat only. Lower fat creams can seize or not thicken properly.
Brown sugar (½ cup / 100g, packed) — For that deep caramel flavor.
Unsalted butter (¼ cup / 55g) — Adds richness and helps the glaze set slightly.
Salt (½ teaspoon) — To make it a true salted caramel. This is crucial for balancing the sweetness.
Vanilla extract (1 teaspoon) — Added at the end to preserve the flavor.
Pro Tip: I always keep a block of Parmesan in the fridge for other recipes, but for this cake, I make sure I have fresh apples. Old, mealy apples won’t give you that fresh burst of flavor. Pick apples that are firm and fragrant.
Equipment Needed
You don’t need a fancy kitchen to make this cake. Here’s what I actually use:
9×13 inch baking pan — A standard glass or metal pan works best. I prefer glass because it browns the bottom evenly. Grease it well and line the bottom with parchment paper for easy removal.
Large mixing bowls — You’ll need one for dry ingredients and one for wet. Having two bowls ready makes the process smoother.
Electric mixer — A hand mixer or stand mixer is helpful for creaming the butter and sugar. You can do it by hand, but it takes about 10 minutes of arm workout. I recommend the mixer for consistent results.
Whisk — For mixing the dry ingredients evenly. Make sure there are no lumps of baking powder or salt.
Spatula — A silicone spatula is essential for folding in the apples without crushing them. You want to keep the batter light.
Saucepan — Small to medium size for making the caramel glaze. A heavy-bottomed pan helps prevent scorching.
Measuring cups and spoons — Accuracy matters in baking. I use metal measuring cups for dry ingredients and glass for liquids.
Cooling rack — Essential for letting the cake cool properly. Placing it directly on the counter can trap heat and make the bottom soggy.
Optional: Pastry brush — Useful for brushing the pan with butter or for applying the glaze evenly.
How to Make It: Step-by-Step
Alright, let’s make this! I’m walking you through exactly how I do it, including the little tricks I’ve picked up over the years.
Step 1: Prep Your Pan and Oven (5 minutes)
Preheat your oven to 350°F (175°C). This is crucial—make sure it’s fully heated before the cake goes in. Grease your 9×13 inch pan with butter or non-stick spray. I like to line the bottom with parchment paper for easy removal later. Dust the pan lightly with flour, tapping out the excess. This ensures the cake won’t stick.
Step 2: Mix the Dry Ingredients (3 minutes)
In a medium bowl, whisk together the flour, baking powder, baking soda, and salt. Sifting isn’t strictly necessary if you’re whisking well, but it helps aerate the flour. Set this aside. Having your dry ingredients ready makes the wet mixing process much less stressful.
Step 3: Cream the Butter and Sugars (4-5 minutes)
In a large bowl, beat the softened butter, granulated sugar, and brown sugar together on medium-high speed. Beat for about 3-4 minutes until the mixture is light, fluffy, and pale in color. This step incorporates air into the batter, which helps the cake rise. Don’t rush this. If it looks dense, keep beating.
Step 4: Add Eggs and Vanilla (2 minutes)
Add the eggs one at a time, beating well after each addition. Scrape down the sides of the bowl with a spatula to ensure everything is incorporated. Add the vanilla extract and mix briefly. The mixture might look slightly curdled at this point—this is normal. It will come together when you add the wet and dry ingredients.
Step 5: Alternate Wet and Dry Ingredients (3 minutes)
Reduce the mixer speed to low. Add half of the dry ingredients, mixing until just combined. Then add all of the buttermilk, mixing gently. Finally, add the remaining dry ingredients. Mix until *just* combined. Do not overmix! Overmixing develops gluten, which leads to a tough cake. The batter should look thick and slightly lumpy. That’s good.
Step 6: Fold in the Apples (3 minutes)
Using your silicone spatula, gently fold in the diced apples. Be careful not to crush them. You want distinct pieces of apple throughout the cake. If you’re using cinnamon, add it to the apples before folding. Distribute the apples evenly in the batter.
Step 7: Bake the Cake (45-50 minutes)
Spread the batter evenly into the prepared pan. Smooth the top with the spatula. Place in the preheated oven and bake for 45-50 minutes. The cake is done when a toothpick inserted into the center comes out clean or with just a few moist crumbs (no wet batter). The edges should be golden brown and pulling slightly away from the sides of the pan.
Troubleshooting: If the top is browning too quickly but the center is still raw, cover the pan loosely with aluminum foil for the last 10-15 minutes of baking.
Step 8: Cool the Cake (30 minutes)
Remove the cake from the oven and let it cool in the pan for 15 minutes. Then, turn it out onto a cooling rack to cool completely. This is important—trying to glaze a warm cake will cause the caramel to melt and run off. Let it cool for at least 30 minutes, preferably an hour.
Step 9: Make the Caramel Glaze (5 minutes)
While the cake cools, make the glaze. In a small saucepan, combine the heavy cream, brown sugar, butter, and salt. Heat over medium heat, stirring constantly, until the sugar dissolves and the mixture comes to a gentle boil. Let it simmer for 2-3 minutes, stirring frequently, until it thickens slightly. Remove from heat and stir in the vanilla.
Step 10: Glaze and Serve
Drizzle the warm caramel glaze over the completely cooled cake. Use a spatula to spread it evenly to the edges. The glaze will set slightly as it cools, creating a beautiful finish. Slice and serve. This cake is best eaten the day it’s made, but it keeps well for up to 3 days.
Expert Tips & Tricks
Here’s everything I’ve learned from making this cake dozens of times. These tips will save you from my mistakes.
Don’t Skip the Buttermilk
I know it’s an extra trip to the store, but buttermilk is the key to that ultra-moist texture. The acidity breaks down the flour proteins, resulting in a tender crumb. If you make your own buttermilk, let it sit long enough to curdle. It should look slightly thickened.
Room Temperature Ingredients
This is non-negotiable. Cold butter doesn’t cream properly. Cold eggs cause the batter to break. Room temperature ingredients emulsify better, creating a smooth, uniform batter. Plan ahead and take your butter and eggs out of the fridge 30 minutes before you start.
Chop Apples Uniformly
Try to dice your apples into consistent ½-inch pieces. If some are huge and some are tiny, you’ll get uneven distribution. Some bites will be all apple, others will be all cake. Uniformity ensures every bite has that perfect balance.
Don’t Overbake
Cake continues to cook slightly after it’s removed from the oven. If you wait until the toothpick is completely dry, the cake might be dry. Pull it when there are just a few moist crumbs on the toothpick. It will finish setting as it cools.
Glaze Consistency
The caramel glaze should be warm but not hot when you drizzle it. If it’s too hot, it will be too runny. If it’s too cool, it will be too thick and clumpy. Aim for a drizzle-able consistency. If it’s too thick, add a teaspoon of warm cream. If it’s too thin, let it cool for another minute.
Common Mistakes (and how to avoid them):
Mistake: Cake is dry — Fix: You likely overbaked it or used cold ingredients. Use a timer and check early. Ensure ingredients are room temperature.
Mistake: Apples sank to the bottom — Fix: Your apples might be too large, or you didn’t fold them gently enough. Dice them smaller and fold carefully.
Mistake: Glaze didn’t stick — Fix: The cake was too warm. Always glaze completely cooled cakes.
Variations & Substitutions
Once you’ve nailed the basic version, here’s how you can mix it up. I’ve tried all of these.
Walnut or Pecan Version
Add 1 cup of chopped walnuts or pecans to the batter along with the apples. Toast the nuts first for extra flavor. This adds a nice crunch and pairs beautifully with the caramel.
Cinnamon Streusel Topping
Instead of (or in addition to) the glaze, add a streusel topping. Mix ½ cup flour, ½ cup brown sugar, ¼ cup cold butter, and 1 teaspoon cinnamon. Sprinkle over the batter before baking. This adds a crumbly, crunchy texture on top.
Spiced Apple Version
Add ½ teaspoon nutmeg and ¼ teaspoon allspice to the dry ingredients. This enhances the autumnal flavor profile. Great for fall gatherings.
Gluten-Free Option
Use a 1-to-1 gluten-free flour blend. The texture might be slightly denser, but it still works well. Ensure your baking powder and other ingredients are certified gluten-free.
Dairy-Free Option
Replace butter with dairy-free butter alternative. Use coconut milk or almond milk with lemon juice for the buttermilk substitute. For the glaze, use coconut cream and dairy-free butter. It’s different but still tasty.
Mini Cakes
You can bake this in greased muffin tins for individual portions. Bake time will be reduced to 20-25 minutes. Perfect for gifts or portion control.
Serving & Storage
How to Serve:
I usually serve this cake at room temperature. It’s soft, moist, and the glaze is at its best consistency. I often pair it with a cup of hot coffee or tea. For a special touch, serve a slice with a dollop of whipped cream or a scoop of vanilla ice cream. The cold cream contrasts nicely with the warm cake.
Side Dishes:
This cake stands alone as a dessert, but if you’re having a brunch, it pairs well with fluffy Japanese souffle pancakes or fresh fruit. It’s also great alongside savory dishes if you’re serving it as part of a larger meal.
Storage Instructions:
Refrigerator: Store covered at room temperature for up to 3 days. If your kitchen is very hot or humid, refrigerate it. The cake will keep for up to 5 days in the fridge.
Freezing: This cake freezes well. Wrap individual slices tightly in plastic wrap, then in aluminum foil. Freeze for up to 3 months. Thaw at room temperature. Note: The glaze may soften, but it will still be delicious.
Reheating: If you prefer warm cake, microwave a slice for 10-15 seconds. Don’t overheat, or the apples will turn to mush.
Nutrition Information
I’m not a nutritionist, but here’s the breakdown if you’re tracking. This is a rich dessert, so enjoy in moderation.
Per Serving (based on 12 servings):
- Calories: 380
- Protein: 4g
- Carbs: 52g
- Fiber: 1g
- Sugar: 35g
- Fat: 18g
- Saturated Fat: 10g
- Cholesterol: 45mg
- Sodium: 220mg
What’s Good:
- Contains fruit (apples), though the sugar content is high due to the glaze and sugar in the cake.
- Relatively low in protein.
What to Know:
- High in sugar and saturated fat due to the butter, cream, and caramel glaze.
- Contains gluten and dairy.
My Take:
Look, this is a treat. It’s not a health food. But it’s homemade, which means you control the ingredients. When I make it, I sometimes reduce the sugar in the cake by ¼ cup without noticing a difference. It’s all about balance. Enjoy a slice, share it with friends, and don’t feel guilty.
Final Thoughts
So that’s my Ultra-Moist Apple Dapple Cake with Caramel Glaze! I’ve probably talked your ear off at this point, but when you make a recipe this often, you have a lot to say about it.
This cake has saved weeknight desserts more times than I can count. It’s my answer to “what’s for dessert” when I want something special but don’t want to spend hours in the kitchen. My family is happy, my neighbors are happy, and I’m happy because I’m not stressed about cooking.
Make it yours! Try different apples, add nuts, or skip the glaze if you prefer. The best recipes are the ones you adapt to your family’s tastes.
If you make this, drop a comment and let me know what you think! I love hearing how recipes turn out in your kitchen. And if something doesn’t work, tell me that too—I’m here to help troubleshoot.
Happy baking! And I hope your kitchen smells half as good as mine does right now.
Frequently Asked Questions
Can I use other types of apples?
Yes! While Granny Smith is my favorite for the tartness and structure, you can use Honeycrisp, Fuji, or Braeburn. Keep in mind that sweeter apples might make the cake sweeter overall, so you might want to reduce the sugar slightly. Avoid Red Delicious, as they tend to get mushy.
Why did my cake sink in the middle?
This usually happens if the oven temperature was too high, causing the cake to rise too fast and then collapse. It can also happen if you opened the oven door too early. Make sure your oven is calibrated correctly and resist the urge to peek for the first 30 minutes of baking.
Can I make this cake ahead of time?
Absolutely. You can bake the cake 1-2 days ahead and store it covered at room temperature. Make the glaze fresh the day you plan to serve it. If you make the glaze ahead, it will thicken in the fridge. Gently reheat it on the stove before drizzling.
Can I freeze the cake with the glaze on?
It’s better to freeze the cake without the glaze. The glaze can become sticky or separate when thawed. Wrap the cooled cake tightly in plastic wrap and foil. Thaw at room temperature, then make fresh glaze when you’re ready to serve.
What if I don’t have a 9×13 pan?
You can bake this in a 9×13 pan, but you can also use two 9-inch round pans. Reduce the baking time to 25-30 minutes. Check with a toothpick to ensure doneness. The cake layers will be thinner, so they’ll bake faster.
Can I use vegetable oil instead of butter?
You can, but the flavor won’t be as rich. Butter adds a specific taste that pairs well with apples. If you must use oil, use a neutral oil like canola or grapeseed. The texture will be moister, but less flavorful.
How do I know when the caramel glaze is done?
The glaze is done when it coats the back of a spoon and leaves a clear path when you run your finger through it. It will thicken more as it cools. If it’s too thin, cook it for another minute. If it’s too thick, add a splash of cream.
Pin This Recipe!
Ultra-Moist Apple Dapple Cake with Caramel Glaze
- Total Time: 1 hour 5 minutes
- Yield: 12 servings 1x
Description
A tender, incredibly moist apple cake featuring a buttery buttermilk batter, folded-in Granny Smith apples, and finished with a rich salted caramel glaze.
Ingredients
- 2 cups (250g) all-purpose flour
- 1 teaspoon baking powder
- 1/2 teaspoon baking soda
- 1 teaspoon salt (kosher)
- 1/2 cup (115g) unsalted butter, softened
- 1 cup (200g) granulated sugar
- 1/2 cup (100g) packed brown sugar
- 2 large eggs, room temperature
- 2 teaspoons vanilla extract
- 1 cup (240ml) buttermilk
- 3 medium Granny Smith apples, peeled and diced into 1/2-inch cubes
- 1 teaspoon cinnamon (optional, for apples)
- 1/2 cup (120ml) heavy cream
- 1/2 cup (100g) packed brown sugar
- 1/4 cup (55g) unsalted butter
- 1/2 teaspoon salt
- 1 teaspoon vanilla extract
Instructions
- Preheat oven to 350°F (175°C). Grease a 9×13 inch baking pan, line the bottom with parchment paper, and dust lightly with flour.
- In a medium bowl, whisk together the flour, baking powder, baking soda, and salt. Set aside.
- In a large bowl, beat the softened butter, granulated sugar, and brown sugar on medium-high speed for 3-4 minutes until light and fluffy.
- Add eggs one at a time, beating well after each addition. Scrape down the bowl sides. Add vanilla extract and mix briefly.
- Reduce mixer speed to low. Add half of the dry ingredients, mix until combined. Add all buttermilk, mix gently. Add remaining dry ingredients and mix until just combined. Do not overmix.
- Gently fold in the diced apples (and cinnamon if using) using a silicone spatula until evenly distributed.
- Spread batter evenly into the prepared pan. Bake for 45-50 minutes, or until a toothpick inserted in the center comes out clean or with moist crumbs.
- Cool the cake in the pan for 15 minutes, then turn out onto a cooling rack to cool completely (at least 30 minutes).
- While the cake cools, make the glaze: In a small saucepan, combine heavy cream, brown sugar, butter, and salt. Heat over medium, stirring constantly, until sugar dissolves and mixture boils. Simmer for 2-3 minutes until slightly thickened. Remove from heat and stir in vanilla.
- Drizzle the warm caramel glaze over the completely cooled cake. Spread evenly to edges. Slice and serve.
Notes
Ensure ingredients are at room temperature for best emulsification. Do not overmix the batter to avoid a tough cake. The cake is best eaten the day it is made but keeps for up to 3 days at room temperature. For freezing, freeze the cake without the glaze.
- Prep Time: 20 minutes
- Cook Time: 45-50 minutes
- Category: Dessert
- Cuisine: American
Nutrition
- Serving Size: 1 slice
- Calories: 380
- Sugar: 35
- Sodium: 220
- Fat: 18
- Saturated Fat: 10
- Carbohydrates: 52
- Fiber: 1
- Protein: 4
Keywords: apple cake, caramel glaze, moist cake, buttermilk cake, fall dessert, homemade cake, apple dapple cake


